")


")
(*This post is sponsored by Sole Society –
thank you for supporting the brands that help make this little bloggin’ dream of mine a reality!*)

Anytime I post a photo on Instagram wearing a full, fluffy scarf, I get lots of requests for a scarf-tying tutorial…so here ya go, buddies! There are two easy ways that I tie my large, blanket scarves, and both are comfortable and loose enough around the neck not to irritate or give tension headaches (am I the only one who gets weird tension headaches if things are tight or heavy around my neck…?) Love finding super duper soft, beautiful large scarves like this one from Sole Society [HERE], and I also use these when I travel; built in blanket sitch if it gets chilly…hence the name! 😉 Anyway, see below for the easy tips, and I hope this is helpful to you!
How to tie a blanket scarf – Option One
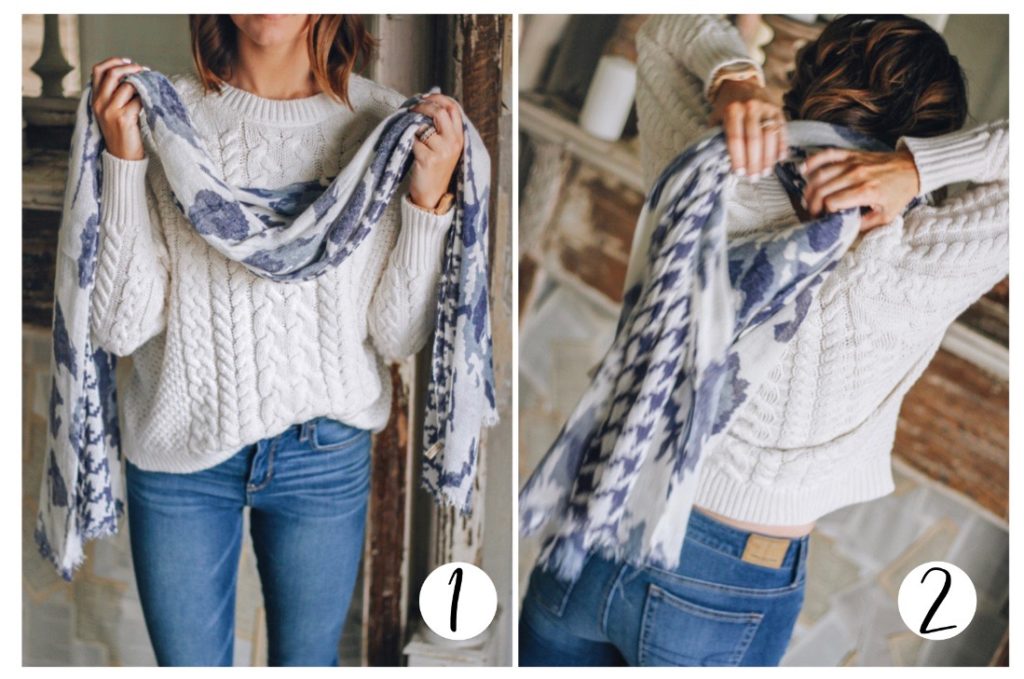
1 – Start with your blanket scarf folded in half lengthwise and center it on your body as pictured with the midpoint of the scarf falling at chest level.
2 – Keeping the midpoint at chest level, cross the end pieces behind your neck loosely.
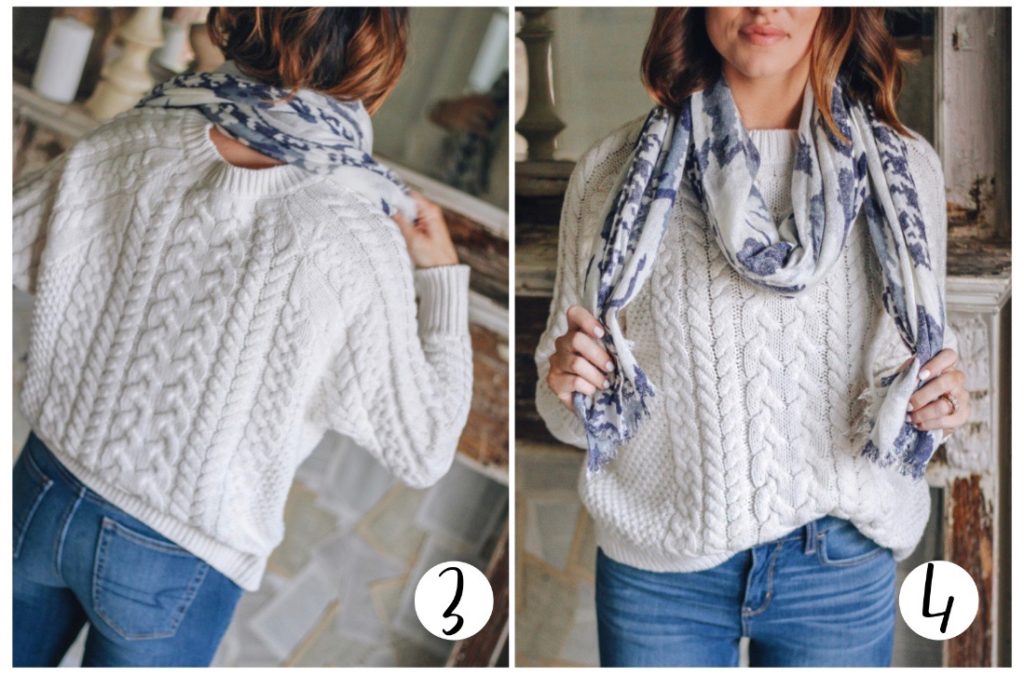
3 – Bring the crossed pieces around to the front.
4 – Adjust scarf to make sure the midpoint is still looped and hanging at chest level and that the ends of the scarf are even on both sides.
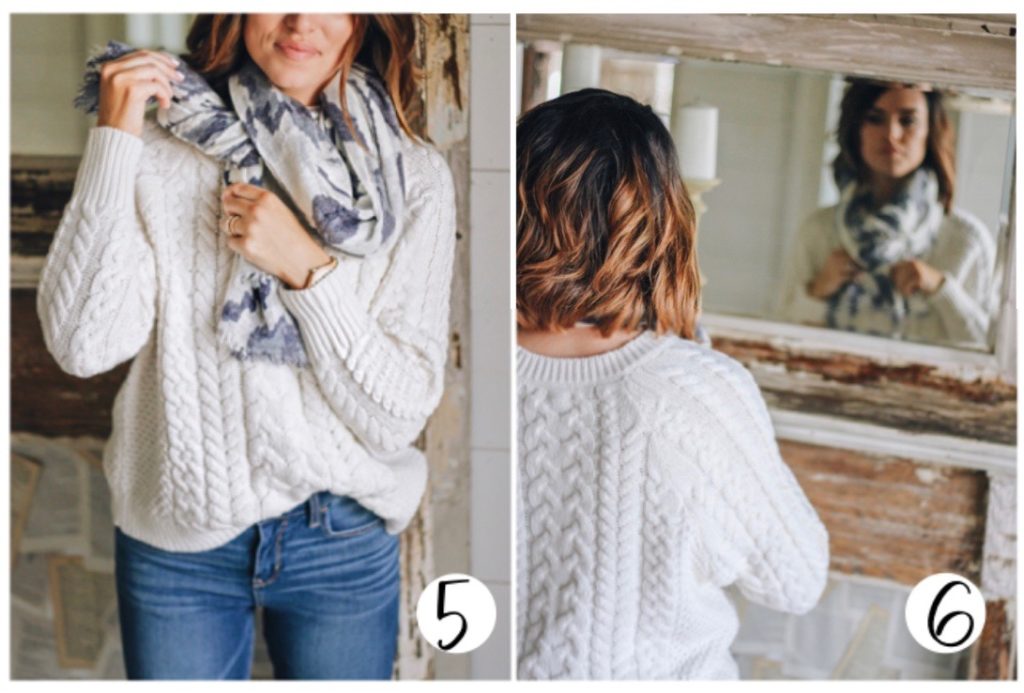
5 – Push aside the midpoint chest-level loop and tie the scarf ends underneath it into a puffy, loose knot.
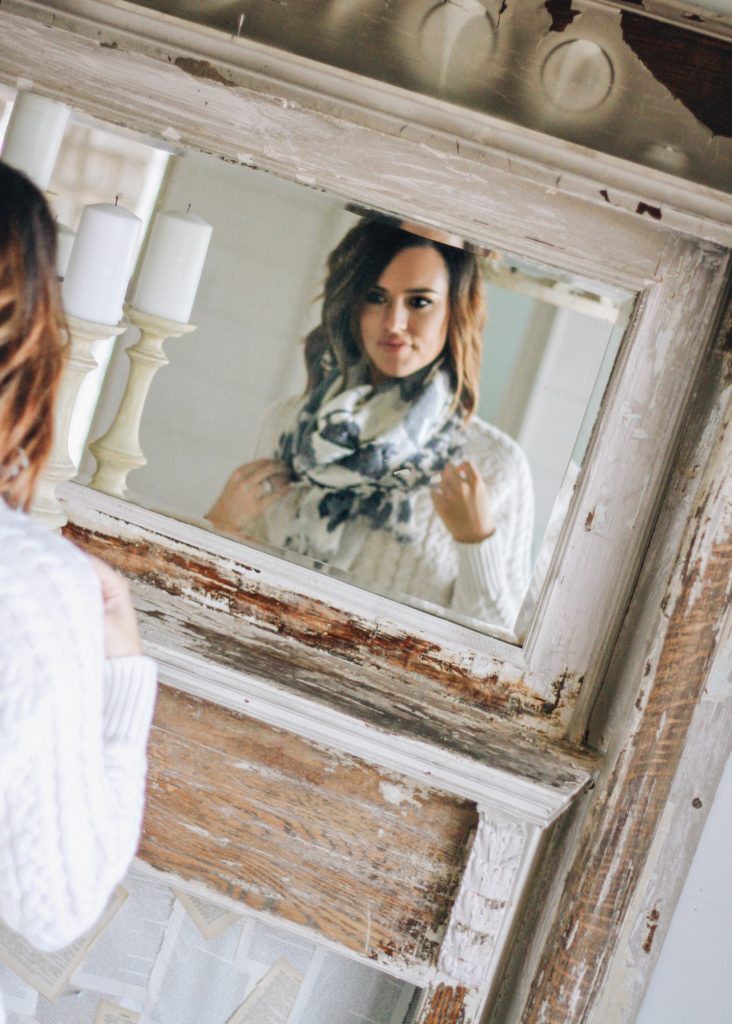
6 – Adjust end pieces, center the knot at chest level, tucking it under the loose midpoint piece. Then, you can fluff the midpoint piece over the knot to create a full look!
How to tie a blanket scarf – Option Two
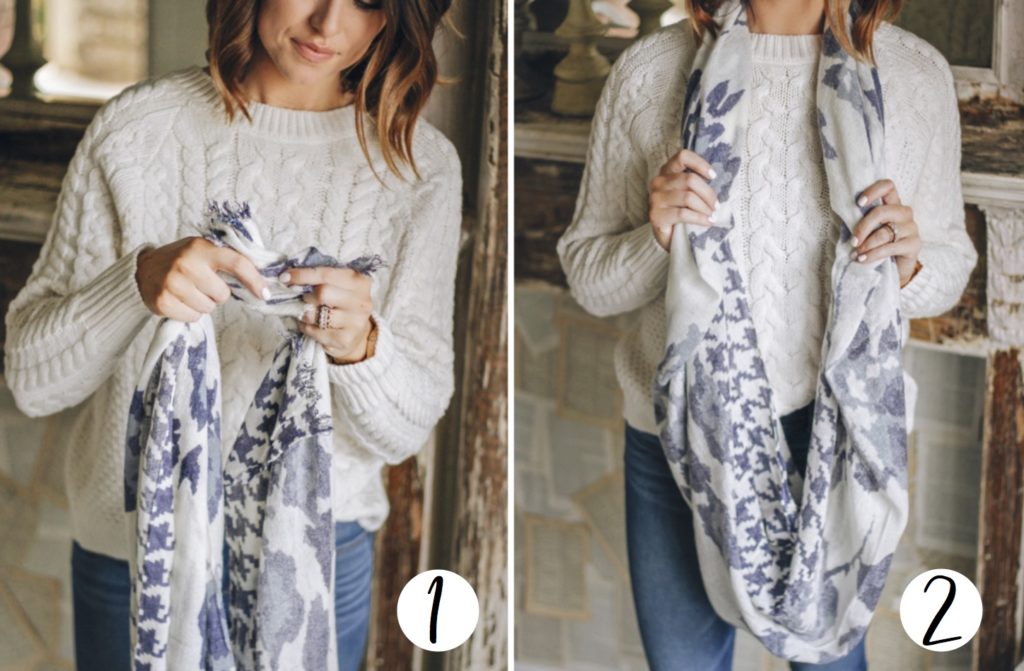
1 – Again, start with your blanket scarf folded in half lengthwise, and then gather the four corners of the scarf into a small knot.
2 – Place knotted section behind your neck and let the rest of the scarf hang loose.
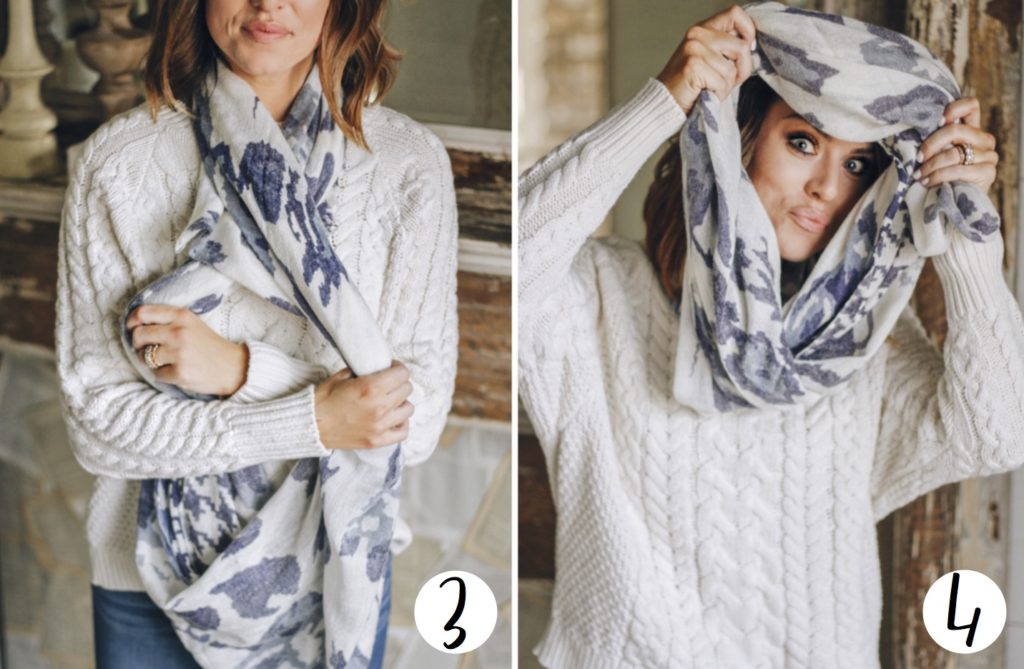
3 – Grab the scarf on both sides and then criss cross the two sections in front of you to create a large loop that is now hanging in front of your stomach.
4 – Keeping ahold of the scarf, now take the newly formed loop up and over your head. You’ve just created an infinity scarf situation! Adjust and fluff as needed to create a nice full look!

Hope these quick and easy tutorials are helpful and fun for you sweet pals o’ mine, and may our necks stay nice and toasty swathed in lovely blanket scarves the rest of this chilly winter!
Hugs to you guys,
❤️ERIN
Sources:


You all must have had so much fun shooting these adorable photos. Love this! Great scarf tips! Definitely saving this to my Pinterest. Thanks!
Ha ha you’re adorable. Peek-a-boo through the scarf!! Great post!🌟
XxMelissa
Ha ha, thanks girl!!
I get those nasty tension headaches too. #theworst
I love these scarf tips + tricks – who knew you could turn a blanket scarf into an infinity scarf?! #mindblown