")


")

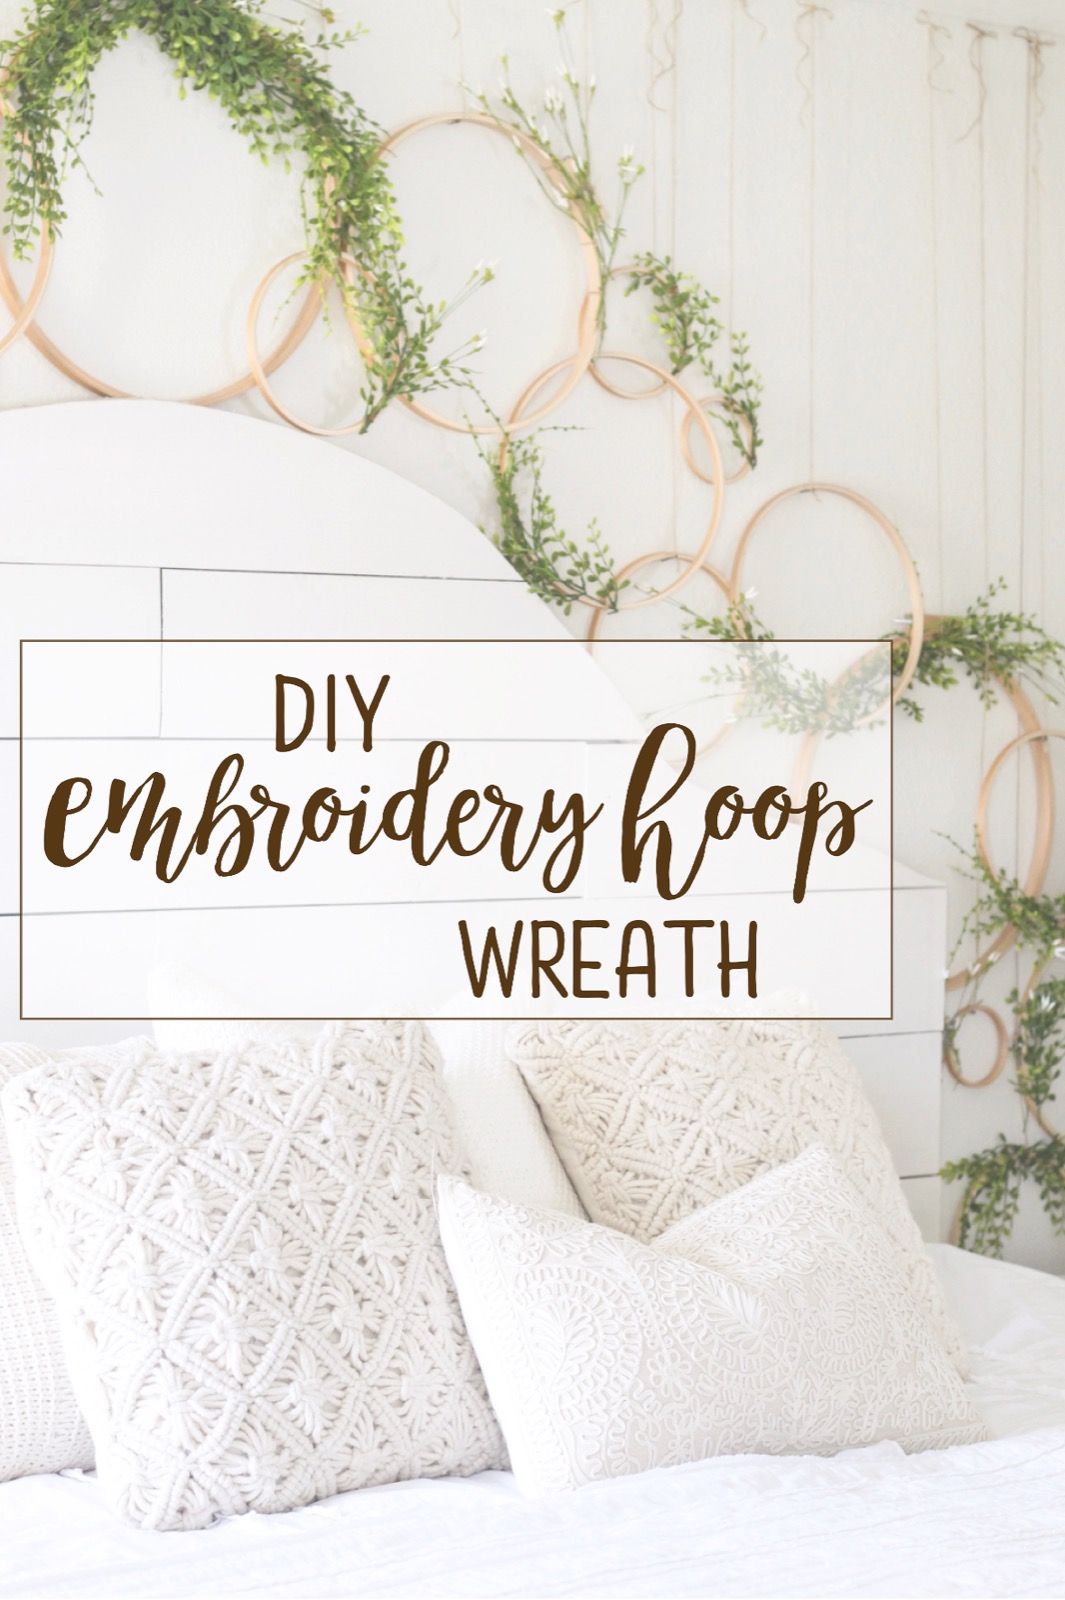
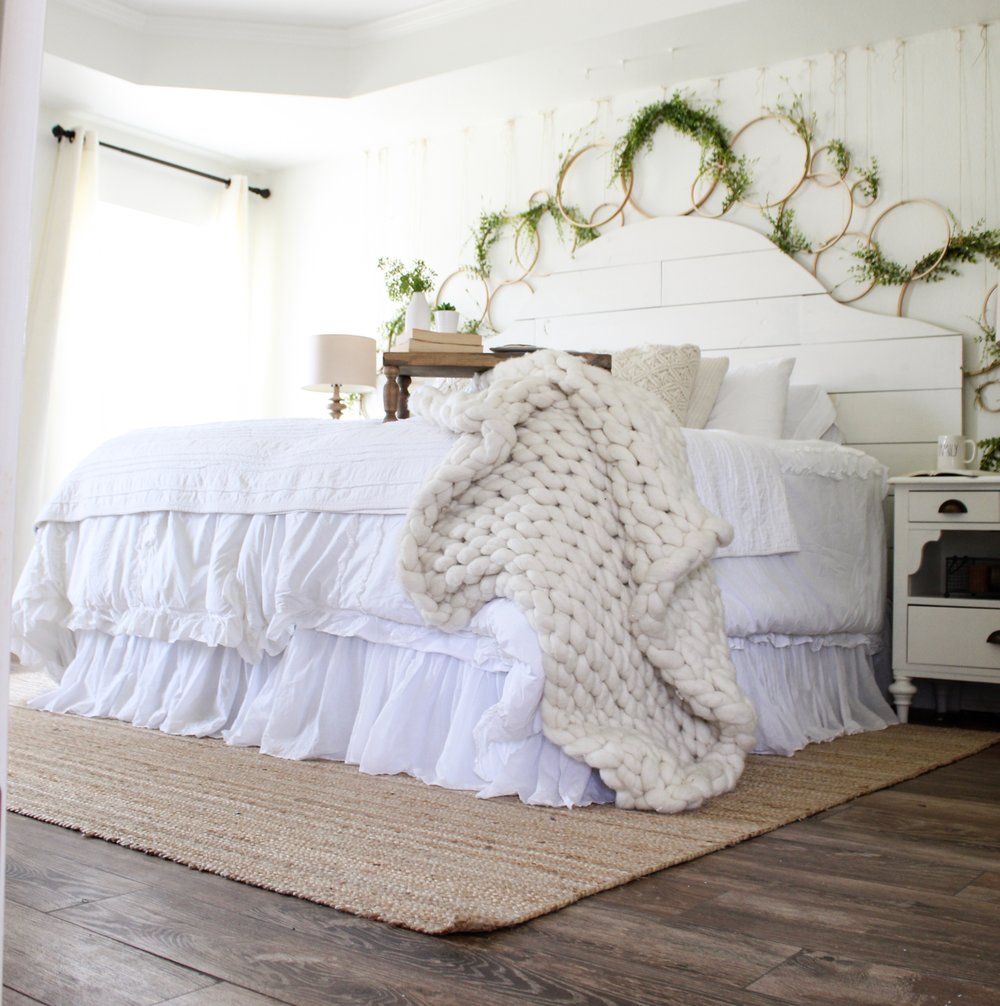
Hi there, friends! By popular demand, here is a simple DIY tutorial on these cheap and charming embroidery hoop wreaths! This project doesn’t cost much, and yet it makes a big statement–make just one for your front door, a trio of wreaths to hang as an indoor mobile, or, if you’re feeling cray (like ol’ Stems here….😳😂), whip up an entire wall for some serious spring feels! 🌿 I’m excited to see what you guys make! See below for the easy tutorial…
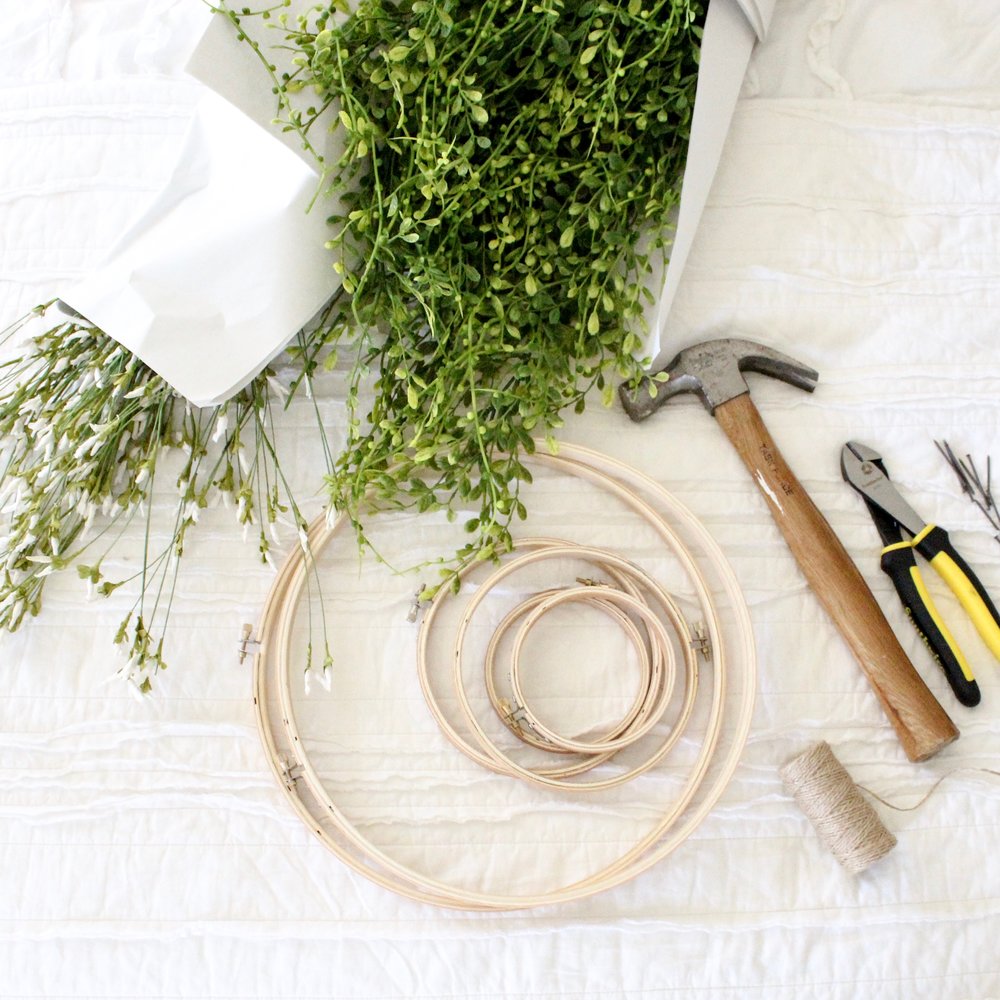
SUPPLIES:
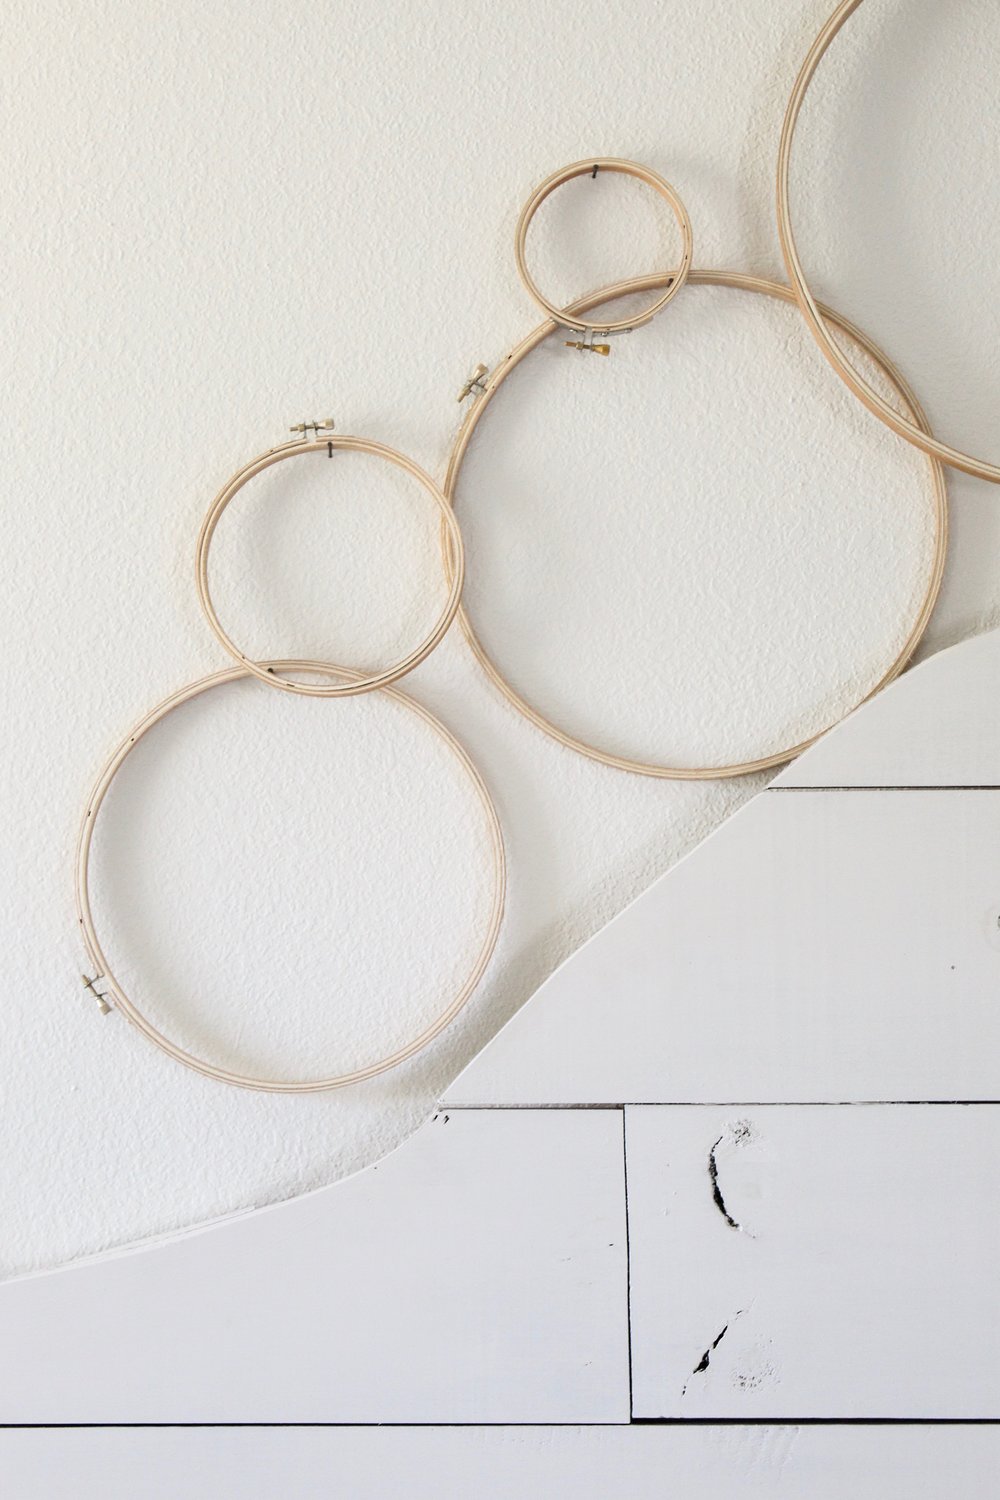
-Embroidery hoops of any size from a craft store
-faux greenery/flowers in lightweight style
-kitchen twine or jute
-small finishing nails
-wire cutters
-hammer
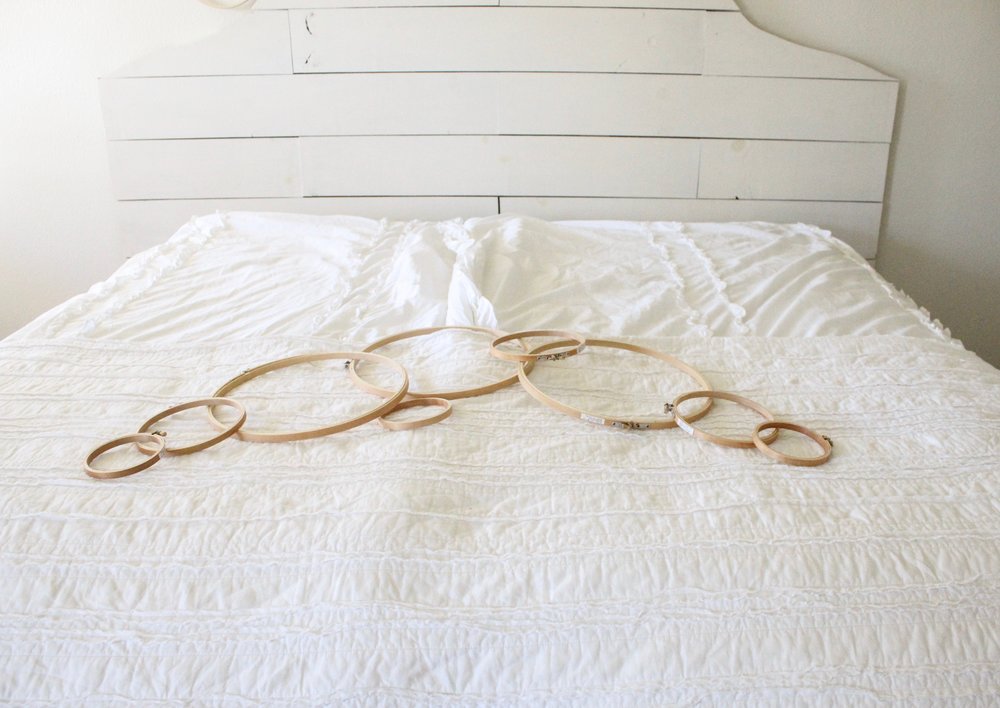
1. Placement
Lay out your hoops on the floor or the bed in order to get an idea of the shape you’d like your design to take once finished. For our bedroom installation, I knew I wanted the hoops to cascade in design, similar to a gauze bed canopy. I started in the middle and began layering the hoops in a decending pattern to match the shape of my headboard. You can do any design you’d like!
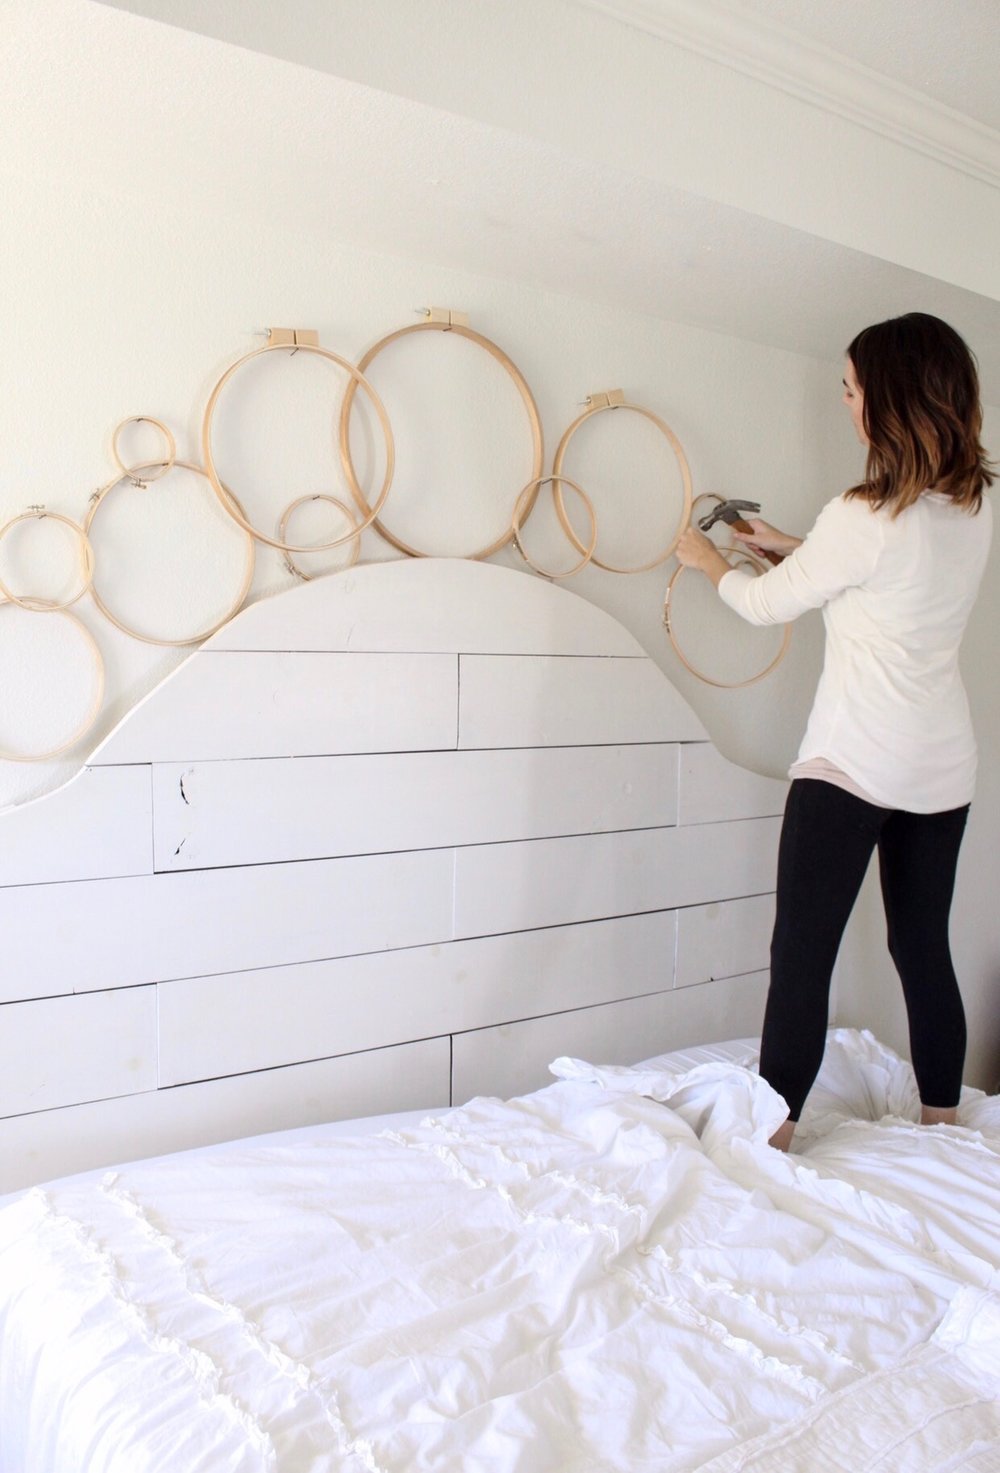
2. Pre-Installation
Once you have an idea of the shape you’d like to create with your wreaths, begin pre-installing them on the wall using your hammer and finishing nails. I wanted to layer larger hoops with smaller ones, and you’ll need to pay attention to how long your nails are if you intend to layer like I did: you’ll need longer nails for those hoops layered on top of others. Hold the hoop where you’d like it to hang, tap in the finishing nail, and keep on layering!
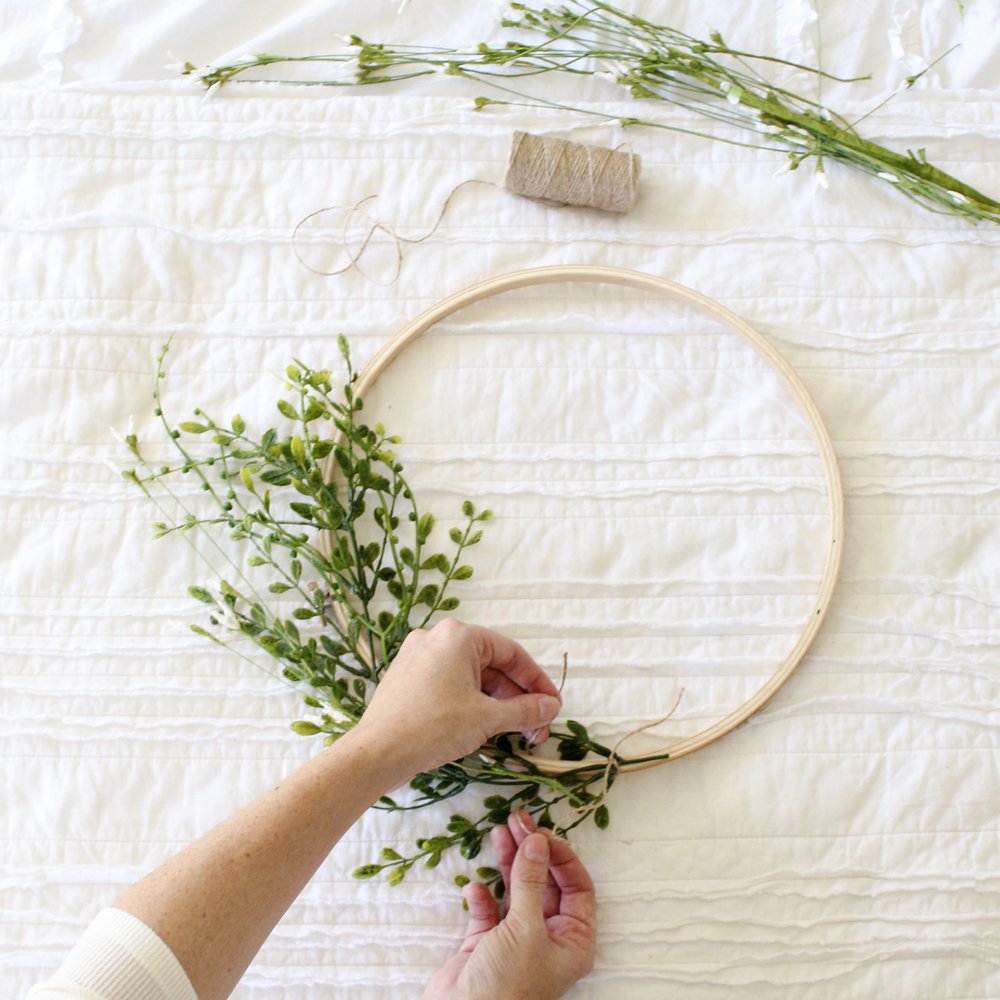
3. Assemble Wreaths
Once you’ve determined the placement of the hoops on the wall, then it’s time to assemble the greenery and/or florals. I’m sure there’s a way more technical way to create a wreath (😳😬), but I’m all about easy and simple…so this is how I made mine!
I just snipped sprigs of greenery and floral stems using the wire cutters, and I laid them on top of the wreath (over the hoop connector…this gave me a girthy spot on which to tie off my greens and florals) to create the movement and desired look I was going for. Once the greenery and florals were layered and placed how I liked them, I used four inch strips of jute/twine to secure them into place. I tied knots up and down the stems about three or four inches apart to make sure they didn’t droop once hung on the wall. Once tied, I snipped the ends of the jute/twine as close to the knot as I could.
You might still be able to see the twine knots up close, but I tried this with thread, and it didn’t hold, nor did it look very aesthetically pleasing with grey wire or green yarn. 😕 The jute sort of blends into the tones of the hoops and lends itself to that natural vibe we’ve got going, so I thought it worked best. Use whatever works for you!

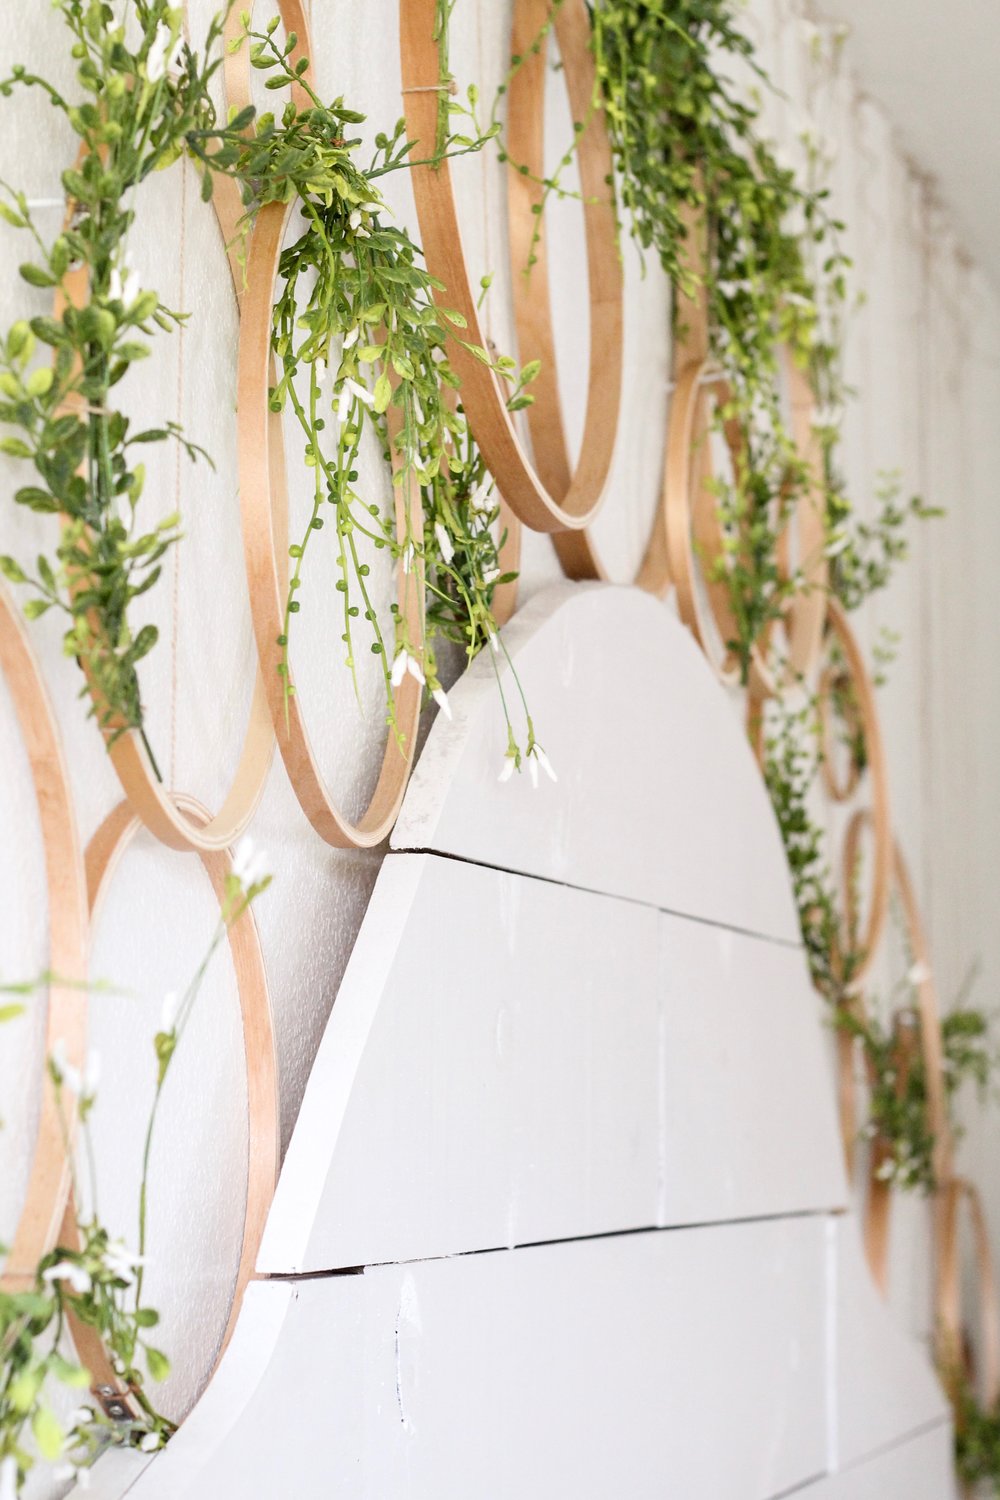
4. Hang Wreaths and Tie Off
After you’ve assembled your wreaths, place them back on their nails on the wall. This step can be a little frustrating as the greenery and florals could bump and dislodge the neighboring hoops. It takes just a minute to get things just so, but it’s worth it!
Finally, if you’d like to create the hanging effect, just take the jute/twine and tie one end to the nail on which hangs your hoop. Stretch the twine to the ceiling (or desired height) and add about a foot extra for tying off. Tap another finishing nail into the seam of the wall and ceiling, and tie the loose end of the twine to this nail. Clip off any excess twine, and you’re done! (If nail holes make you nervous, you could use push pins or snip off small pieces of a command strip…the twine lengths aren’t actually holding anything up, so they don’t need much to keep them in place!)
This easy embroidery hoop DIY project would look beautiful in a nursery, for wedding decor or as a way to add touches of spring to your home! I can’t wait to see how you guys use this tutorial. I’d love for you to follow along on Instagram and tag me so I can see your project come to life! Check out a few other DIY ideas on my Pinterest boards, too!
So I’d love to know where and how could you use this DIY embroidery hoop wreath idea in your home…? Any projects come to mind? And do you guys want to see more posts like this? DIY tutorials and such…? Let me know below!
SOURCES:


I’m so excited about this!!! I would LOVE more tutorial posts!! Like one on how you did your Jane Austin (so awesome that it’s in a magazine) wall!!
Oh man, I wish I could mail you all a copy, because that’s the whole article…a book wall DIY tutorial!!
This is beautiful!! I want to try it out in my laundry room! Maybe if I add some prettiness in there I’ll actually want to DO the laundry?! Worth a shot! 🙂 Also! A little tip: you can USUALLY find embroidery hoops at any thrift store. I bought a ton at my GoodWill for $25 cents each! Can’t beat it. 🙂
Yes! Anything to help doing laundry a bit more pleasant…😩😂 And no way on the cheapo hoops! Good tip!
Everything you touch is amazing!! I am just floored that you thought of this embroidery hoop wreath idea! So so beautiful and lovely for Spring! Thank you for writing up a tutorial on it. I’m not sure if I am brave enough to attempt it, but I would love you to do more DIY tutorials 😊🙌🏼
Hey Stacey! Thanks so so much! I’d seen a few hoop wreaths before and decided I needed a wall of them…bc why not?! 😂 Appreciate the feedback!
Yay!! Perfect! Thank you for sharing your tutorial. I would’ve just started hanging the hoops and wondering how you got them to stay/lay perfectly 😂 A smaller version of this WILL be going somewhere in my daughters nursery. I love it so much!
Oh a nursery would be such a perfect spot!! 🌸
Love this idea and hope to try it soon. I purchased the hoops a couple of weeks ago after seeing your room and this tutorial will hopefully motivate me to execute! I would love to see more "installation" tutorials like your book wall as well. Thank you!
Oh yay, thank you for the feedback, Carla!
So your IG story said leave some feedback soo I came, I read and I like-y. I think the tutorials are great, I love them Bc lets me honest without them you’d be asked a million times a day myself included on how you did it. I love them and I think you should continue with them.
Ha ha, good point!! 😉 Thank you!
I am ALL ABOUT this project. Also your book wall installation, and your flower-ladder wizardry. So yes, I vote more DIYs! I love how your projects are different from what I’ve seen before, they’re natural, and they don’t LOOK like someone is trying to duplicate Pinterest. I appreciate your style, and I’m inspired by your ideas!!!
You have no idea how much this comment means to me–thank you!! Trying to come up with something original or at least something I personally haven’t seen on the internet is like impossible in the age of social media, so your kindness means the world! Truly!
I’ve been waiting for this all week! Thanks for sharing Erin. I also loved what you said on instagram stories today. You’re just so sweet and down to earth and I’m happy to be following along with your happy design adventures. Definitely looking forward to more blog posts and tutorials from you!
I appreciate this sweet comment so much–thank you, Sarah! I hope the tutorial helps!!
This is beautiful, Erin!! Your ideas and blog encourage me to try so many things that I wouldn’t have thought of! Thank you!!!😊 I can’t decide if I want to do this in my girls room, or on a small wall in my living room. I love this so much!
Well, whatever you decide, please tag me so I can see your beautiful creation!!
I will definitely do that!
Easy peasy! Even I (who cannot make anything) can tackle these. Love them, Erin!! And I love that shiplap headboard your hubby made. Great teamwork.
xoxo
Loi
Tone on Tone
Oh Loi, but you can keep real live plants alive! Teach me your ways! 😉
Sooo cute! I love this! Might try it in our new house!!! Thanks! ❤️ your stories!!!
Thank you, Cindy!
I’m curious as to what size hoops you used? They look much larger than the ones you linked to in the post. Thanks!
I used alllllllllll the sizes. I just linked a few options on the post, so you’ll have to kind of size up your space and decide what would work best! 🙌🏻
I love this idea so much and would love to try it. How did you layer the hoops? Are they glued together or did you use wire?
Amber Aiken
Thank you! I just used nails of varied lengths!
I used giant hoops (23", 18" and 16", I think?) and stained them with walnut stain. Lots of floral wire and hot glue kept them all friends and two matching sets were the perfect touch to the front of our sanctuary for Easter. Soooooo pretty!! Thanks for sharing inspiring ideas! xo
Oh awesome! That sounds so beautiful!
Love this! Bought some hoops and greenery today! Thanks for the inspiration!
I just did this in a floral themed nursery for my little girl. 🙂
I am hosting my sons wedding at our lake house in two months and we are going to use this idea for a table backdrop. Can’t wait to try it! Love your inspiring feed so much!
Oh that’s perfect! Thank you!
[…] With such a large, empty wall space I wanted to add something to draw your eye a bit from this angle. I was so inspired by Erin over at the Cotton Stem. She created a beautiful embroidery hoop wreath wall over her headboard, and it is to die for. You can check out her full DIY tutorial here. […]
[…] The main wall is hard to photograph because her room is so small but we have two large frames and then I created these simple little floral embroidery hoop wreaths to fill up that big wall. These were mostly inspired by the embroidery hoop trend I have been seeing all over weddings on Pinterest but Cotton Stem blog does a lovely job with embroidery hoops as well. […]
So clever and easy and PRETTY! Thank you for sharing. I might just be a grateful copycat!
I can’t wait to try this next spring 🙂
Ok! I’m ready…. heading to store tomorrow to buy my hoops🌿🌿 wish me luck!!!
Love all of this, wanting to use this look for my wedding!!! Where did you find the greenery?!??
[…] I am really in love with the hoop art that we put over her oversized chair. It really set the tone for the soft and feminine vibe we were going for. I will share my own tutorial for this soon, because I did a pretty different approach, but it was inspired by this design by Erin at CottonStem. […]
[…] gallery wall above the bed. Simple and gorgeous style! Cotton Stem always does amazing […]
[…] I’ve seen the cutest embroidery hoop wreaths that hang on the wall. […]
I’m going to attempt this for a photo background for our churches eAster gathering. I can hardly wait to see how it turns out!
[…] via Cotton Stem […]