")


")
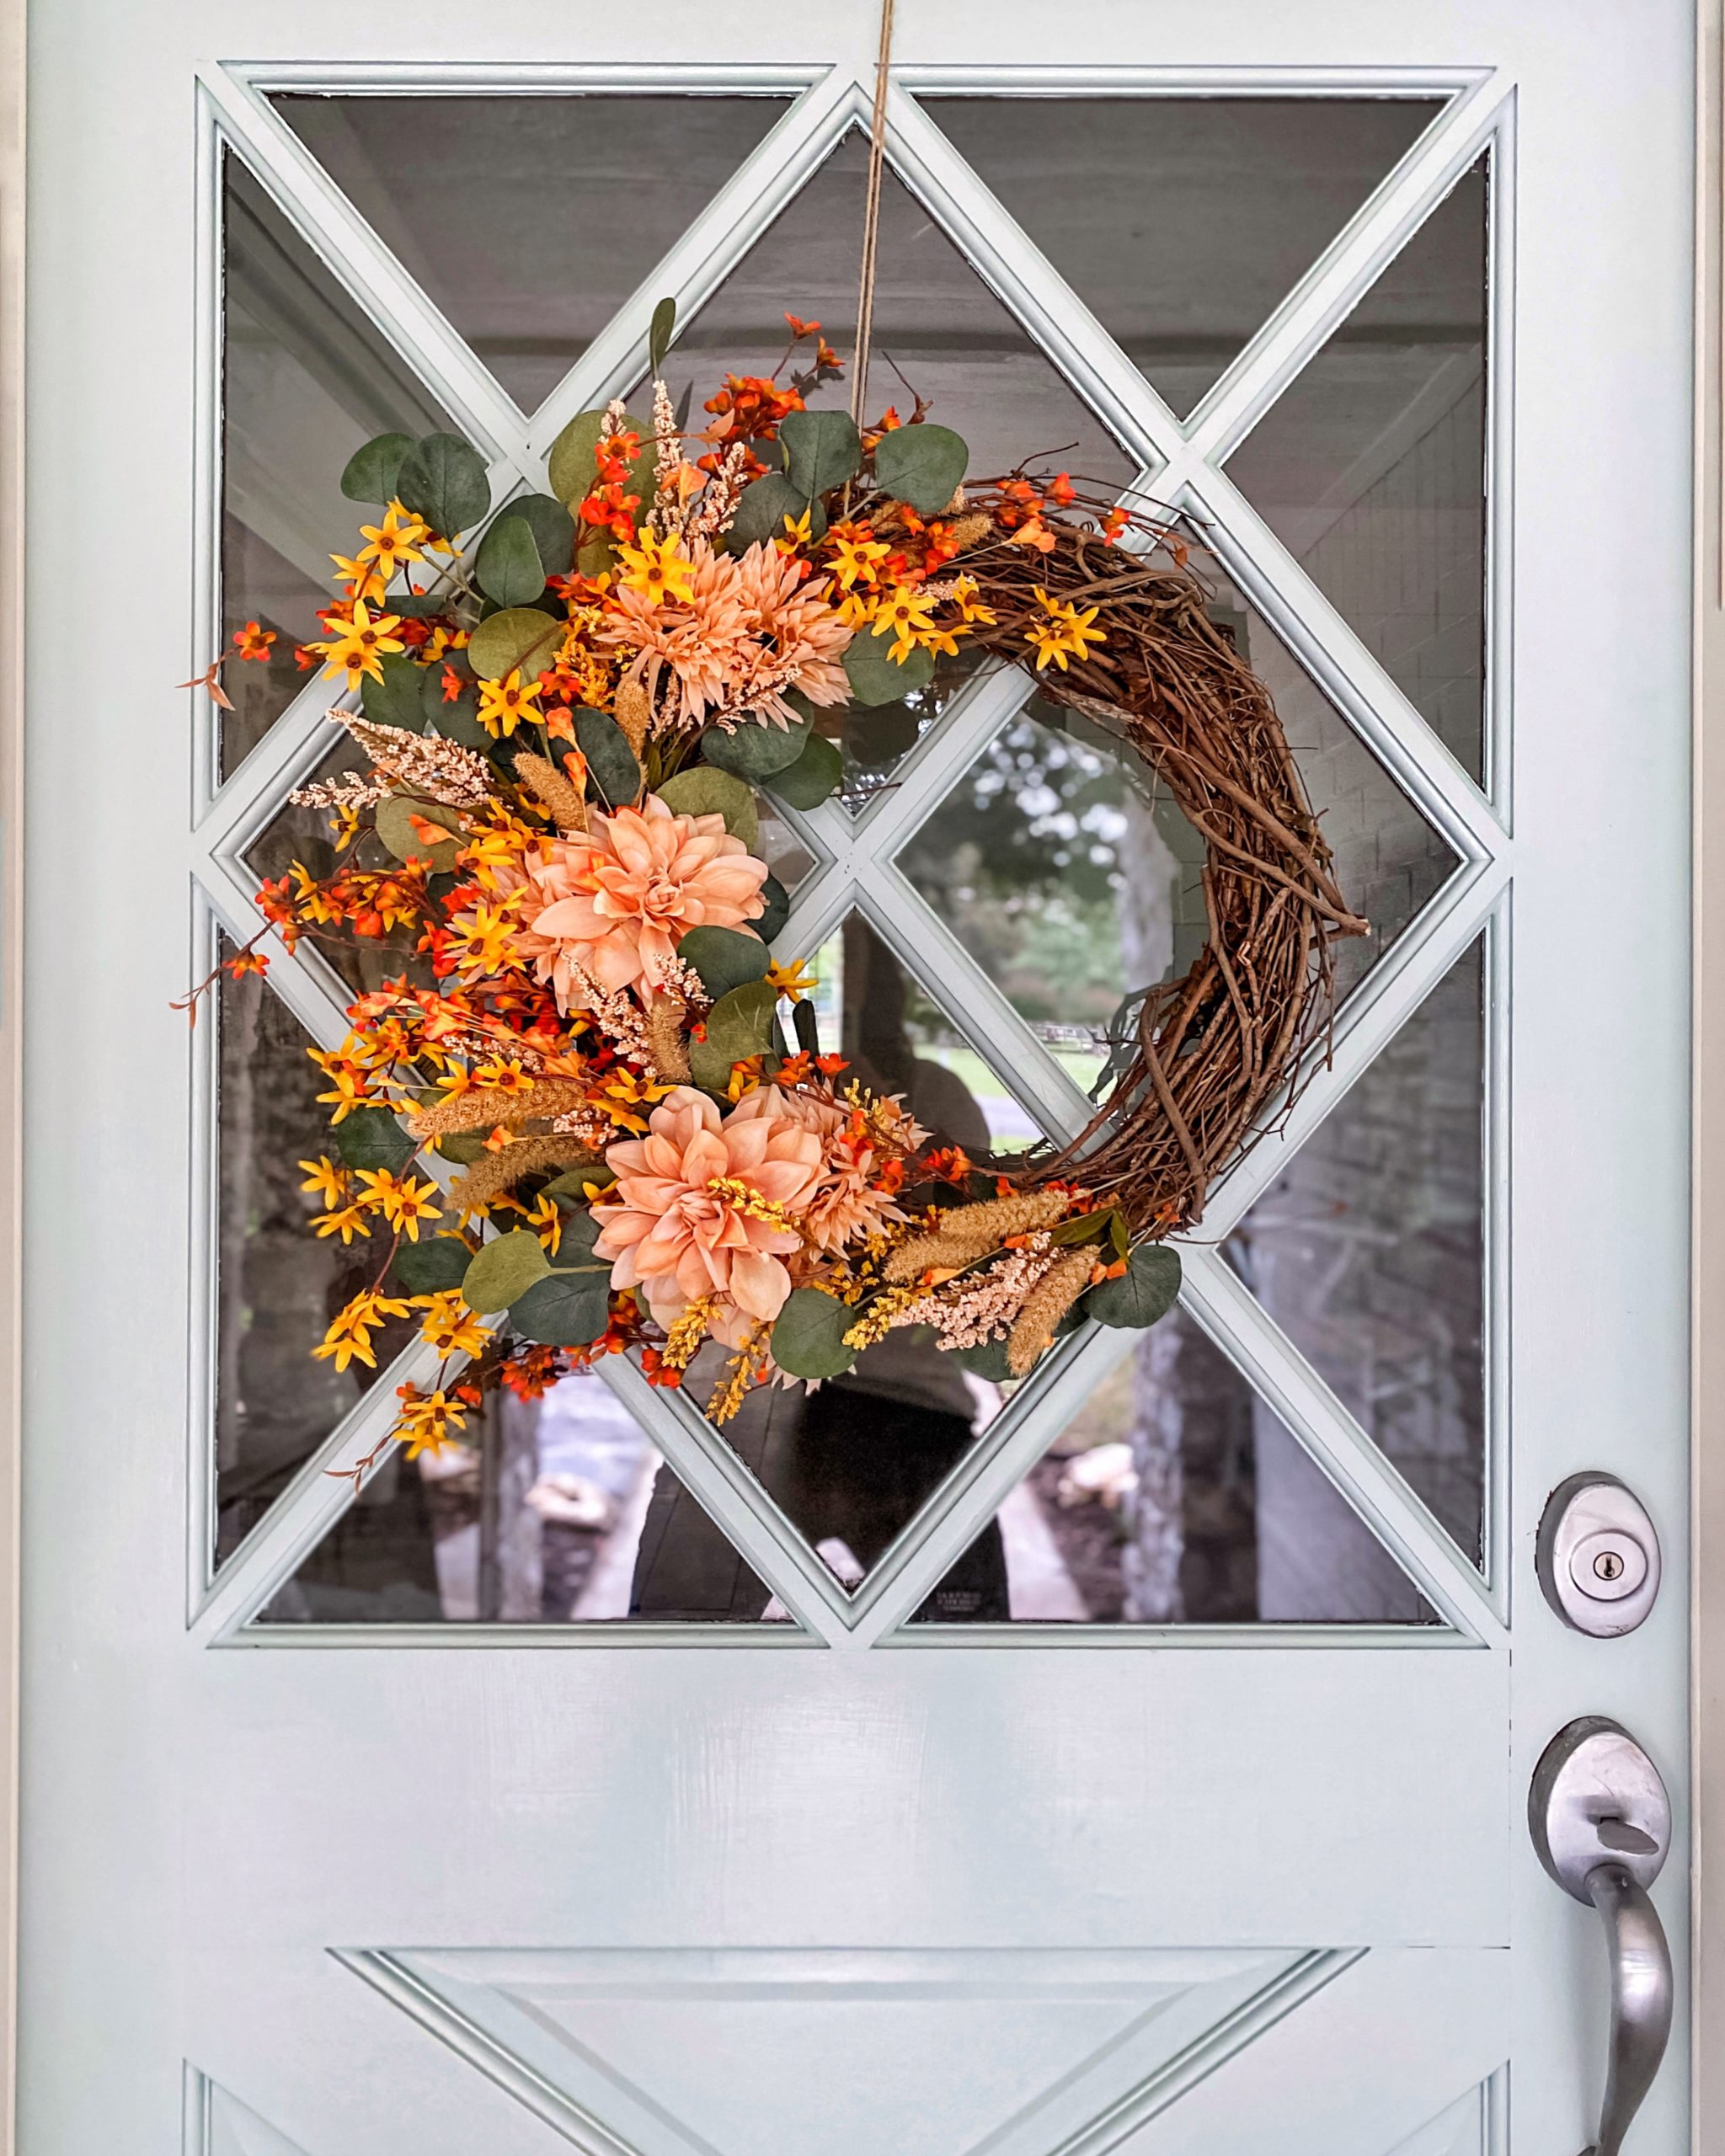
I’m ready for fall, y’all. The temps might still say “Summer,” but my heart is screaming “FALL!!!” I’m not quite ready for pumpkins to invade the house quite yet, but I wanted to gently bring some fall to the front door with this DIY fall wreath recipe I use whenever creating wreaths from scratch! It’s a pretty simple concept, and it makes it so fun to play and create something that is perfectly your style. Here’s how I put together this happy, fall wreath!
For supplies, you’ll want to start with a simple grapevine wreath and some wire cutters. I like using the grapevine wreaths as a base, because there are so many nooks and crannies where you can shove in the wire floral stems and they’ll stay in place easily! You can bend the wires around the grapevines, and it makes creating a wreath pretty user friendly. Plus, they are inexpensive!

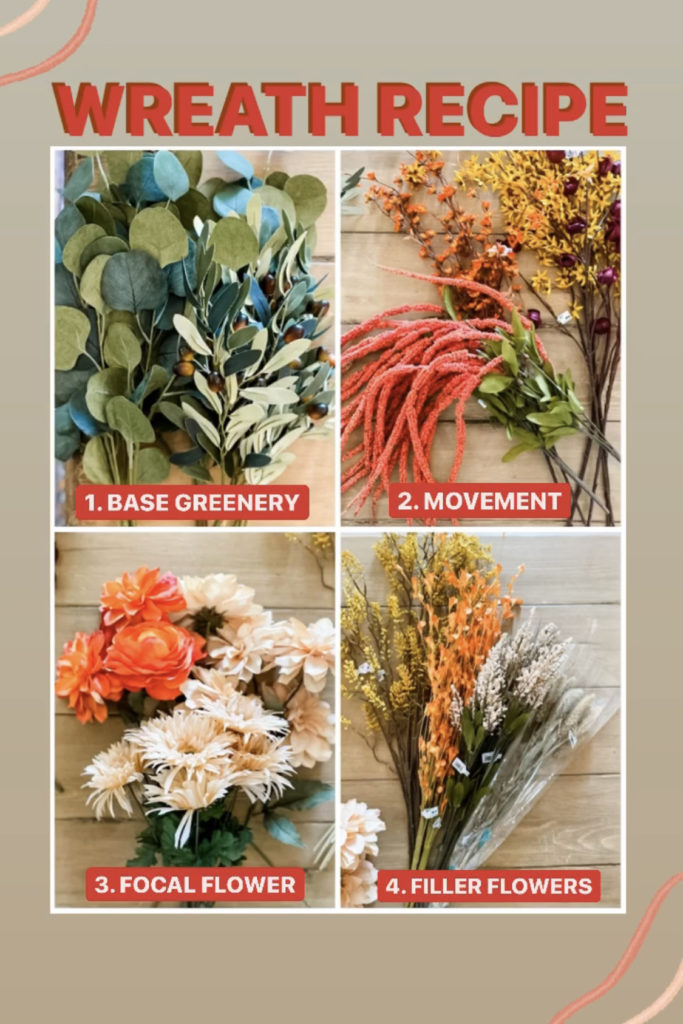
Next, you’ll want to grab some floral stems to use for the wreath. I can’t decide which colors and flowers I’ll want to use at the store, so I usually buy extra, choose what I want to use and then return the rest. I like to grab four types of florals:
1 – Base Greenery: use this to fill in holes in the wreath as you build up the flower arrangements, and it can set the tone of the wreath seasonally (evergreen for winter, bright green for spring, muted green for fall)
2 – Movement: these are flowers or greenery stems that have drape or fall when they are hanging vertically on a wreath, and they draw the eye while creating movement!
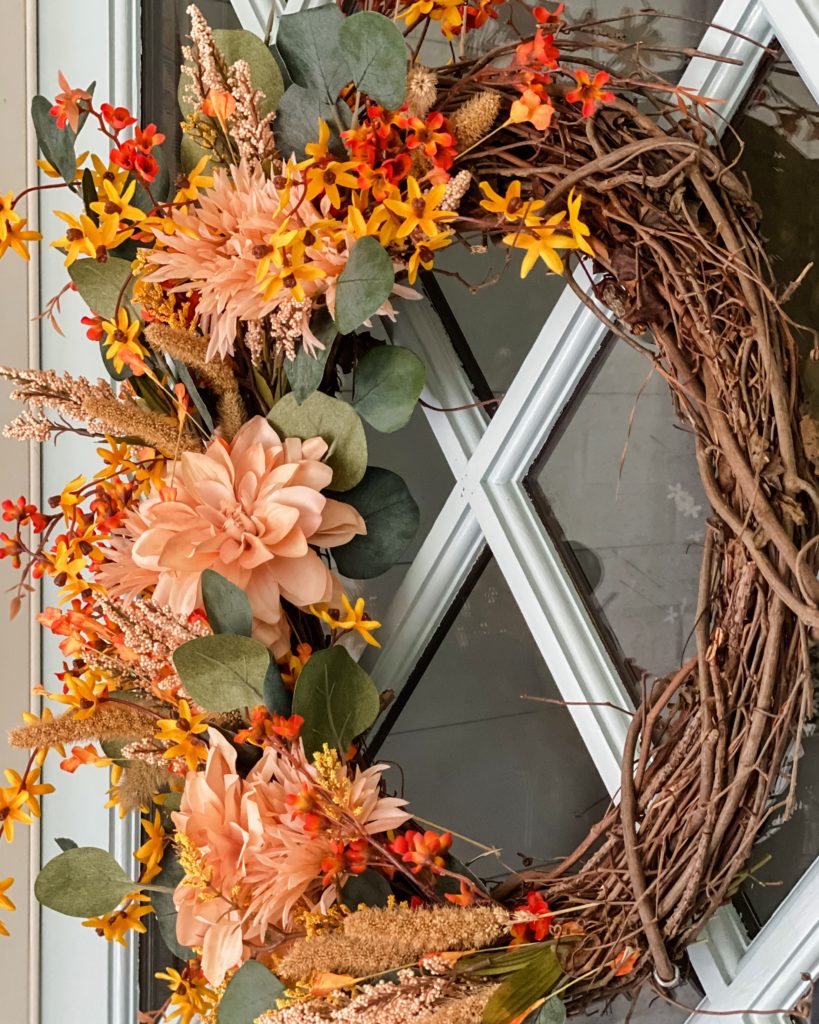
3 – Focal flowers: in each grouping of flowers, you’ll want to grab 1-3 larger focal flowers to anchor the arrangement. The colors of the focal flowers set the tone for the color scheme, too! For this wreath, I wanted a blush fall vibe, so went with blush pinks.
4 – Filler flowers: these are for adding texture, pops of color and filler to the whole arrangement! Choose coordinating colors that play off of each other. For example, I chose an atypical fall color (blush pink) as my focal flower, so I wanted to make sure the wreath read “fall” by adding more traditional fall colors via filler flowers.
To build your wreath, start with your focal flower and build out from there, adding movement, filler and greenery as you go! The wire cutters come in handy, because I like to trim the stems down a bit as I move around the wreath. I like to group two or three focal flowers together to anchor the design, and then I start adding filler and movement around the grouping. But really…do whatever you want! This is just a simple recipe to get started — playing is half the fun of these DIY’s, right?

I’m so happy with how this little guy turned out, and it’s just the right pop of fall color on the front door to usher the way for the changing season. Next up: FILL MY HOUSE WITH PUMPKINS. It’s such a weird year, so pumpkins can only help, right? 😉 Hope this DIY fall wreath recipe was helpful, friends! If you want another easy wreath project, check out my embroidery hoop wreaths [HERE] and [HERE]!
❤️ERIN


share this post on
comments
0
leave a comment