")


")
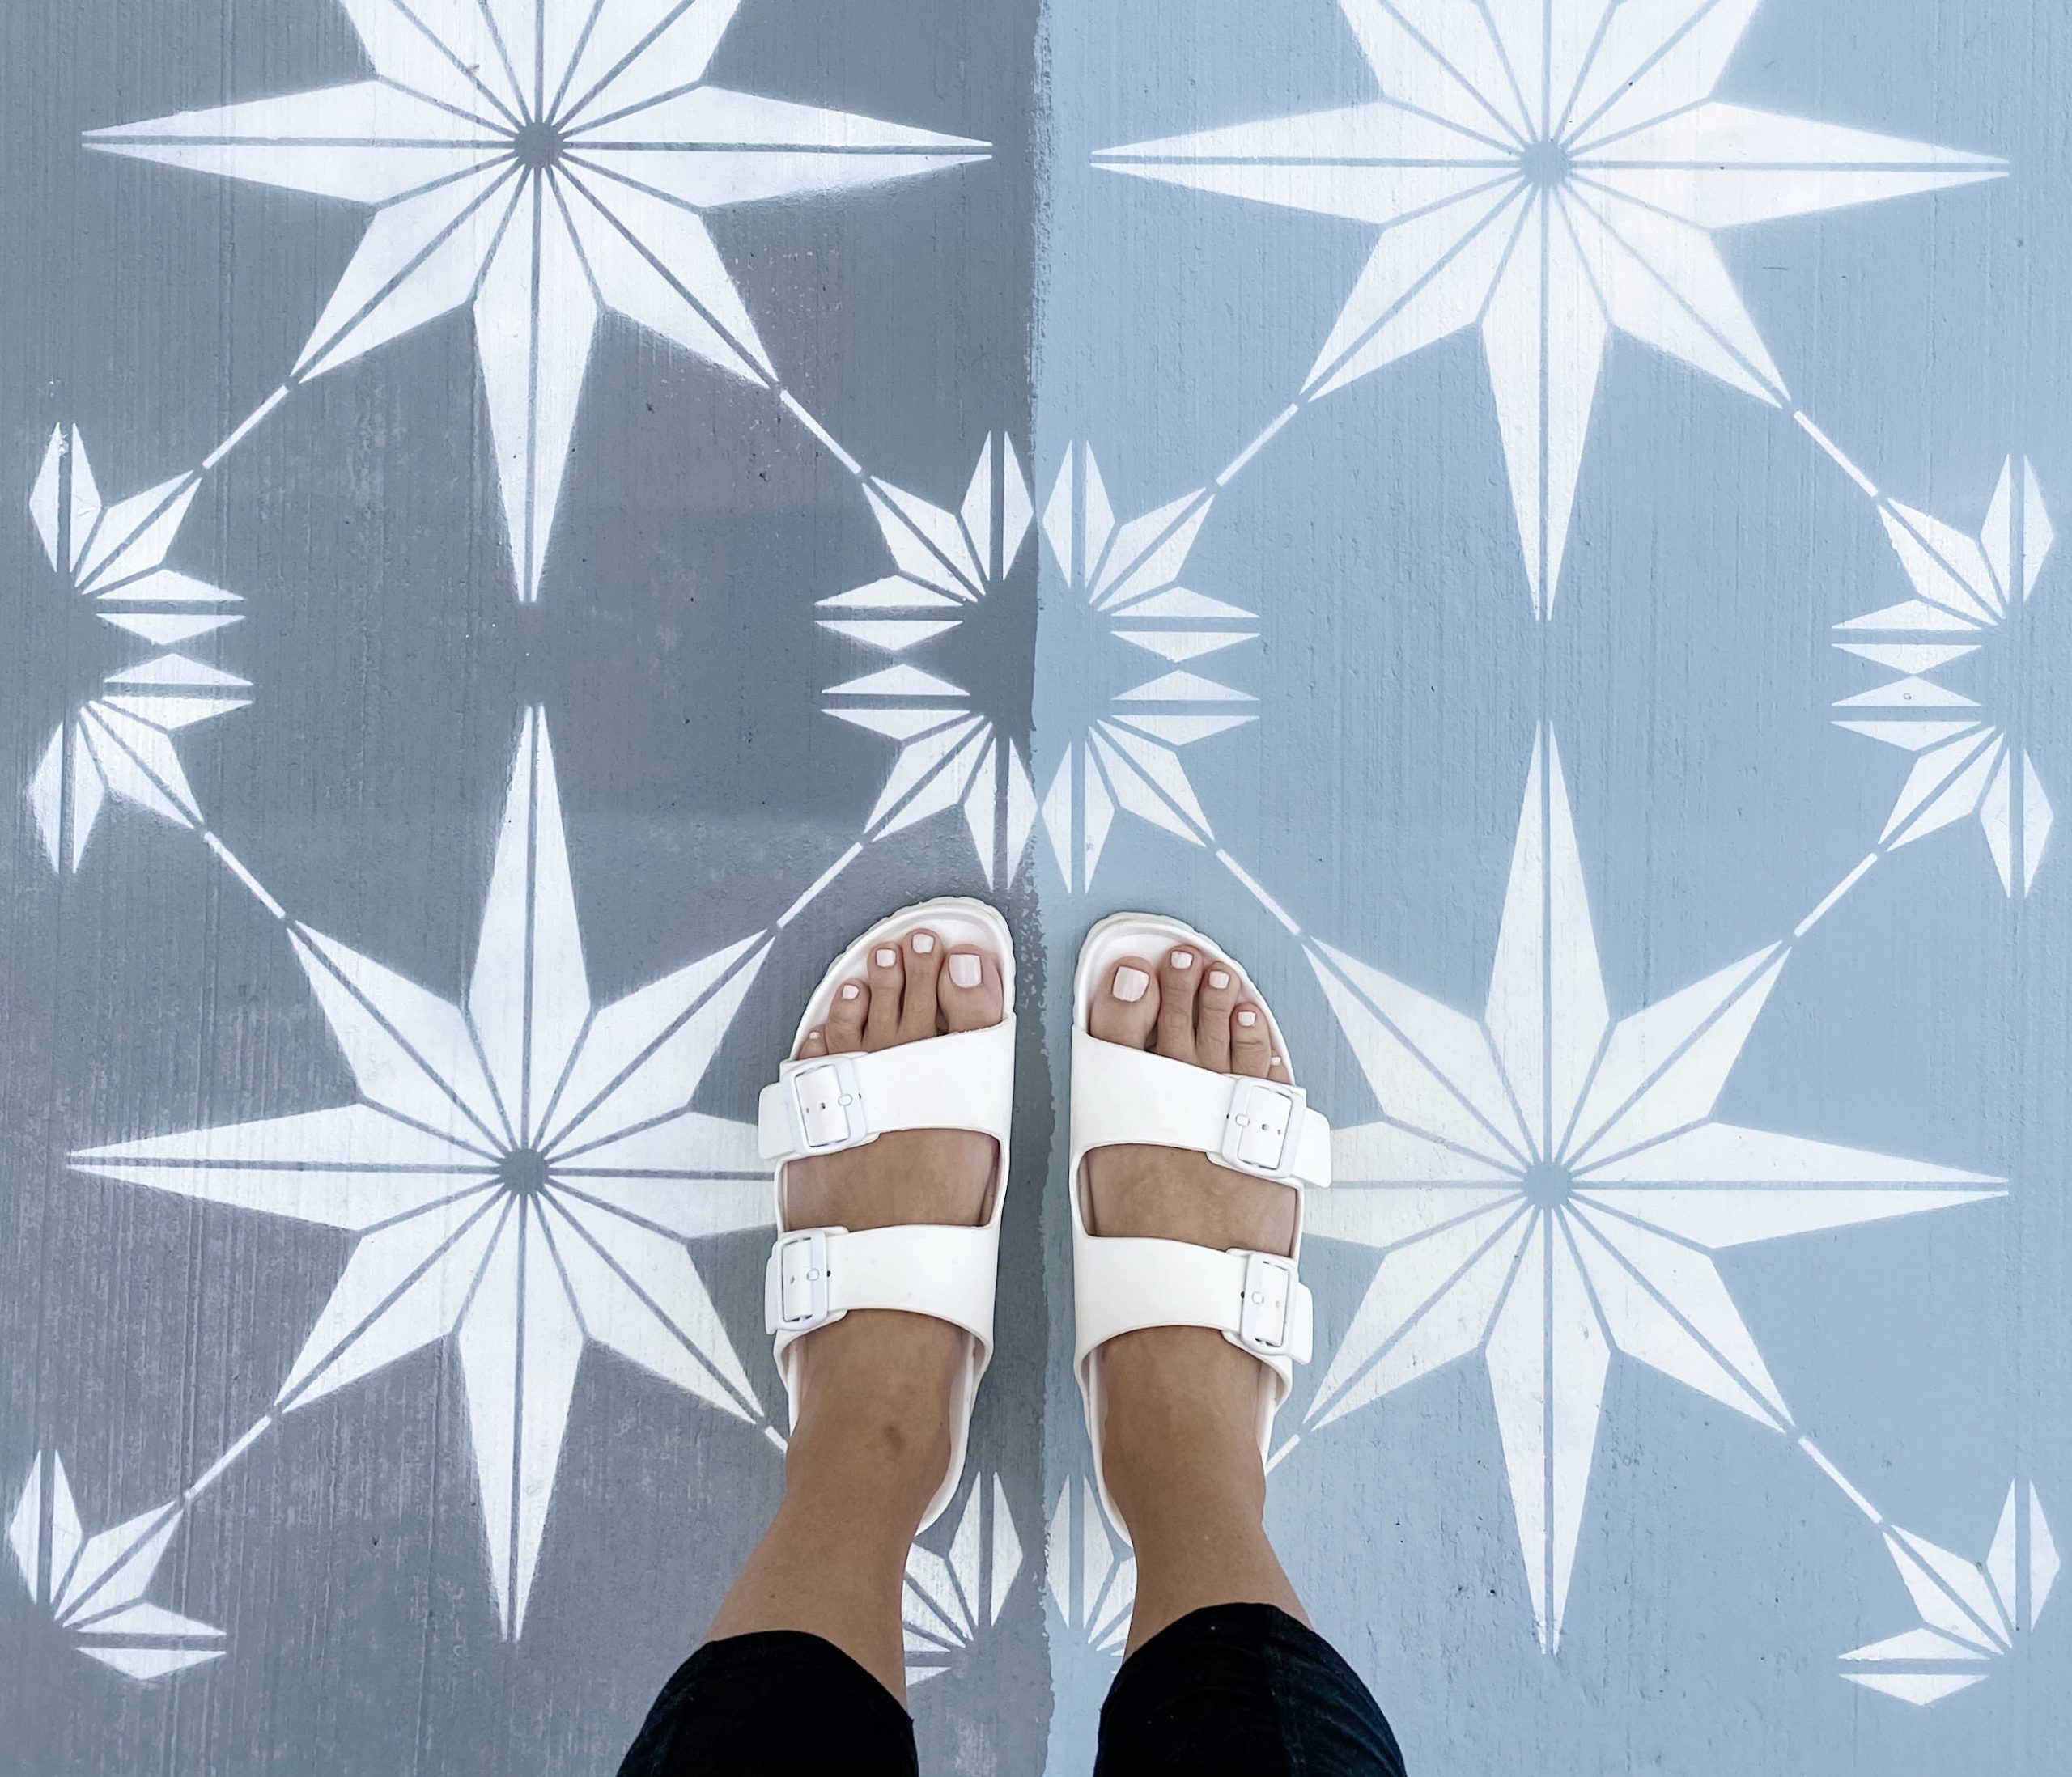
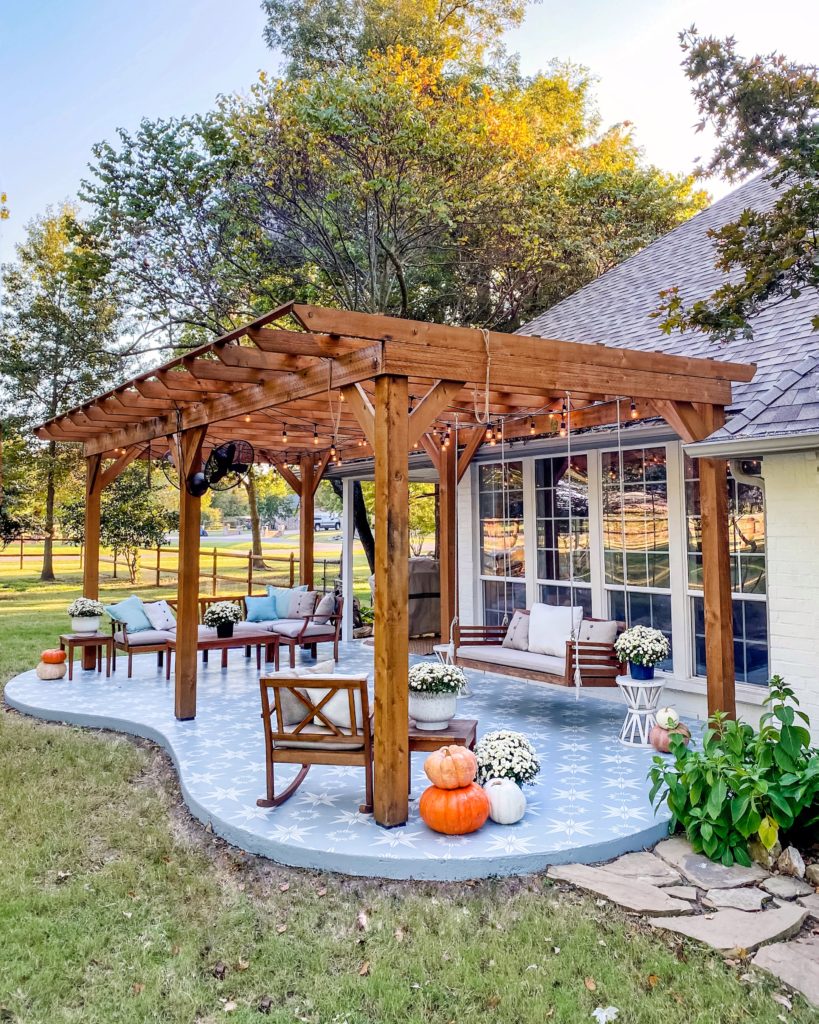
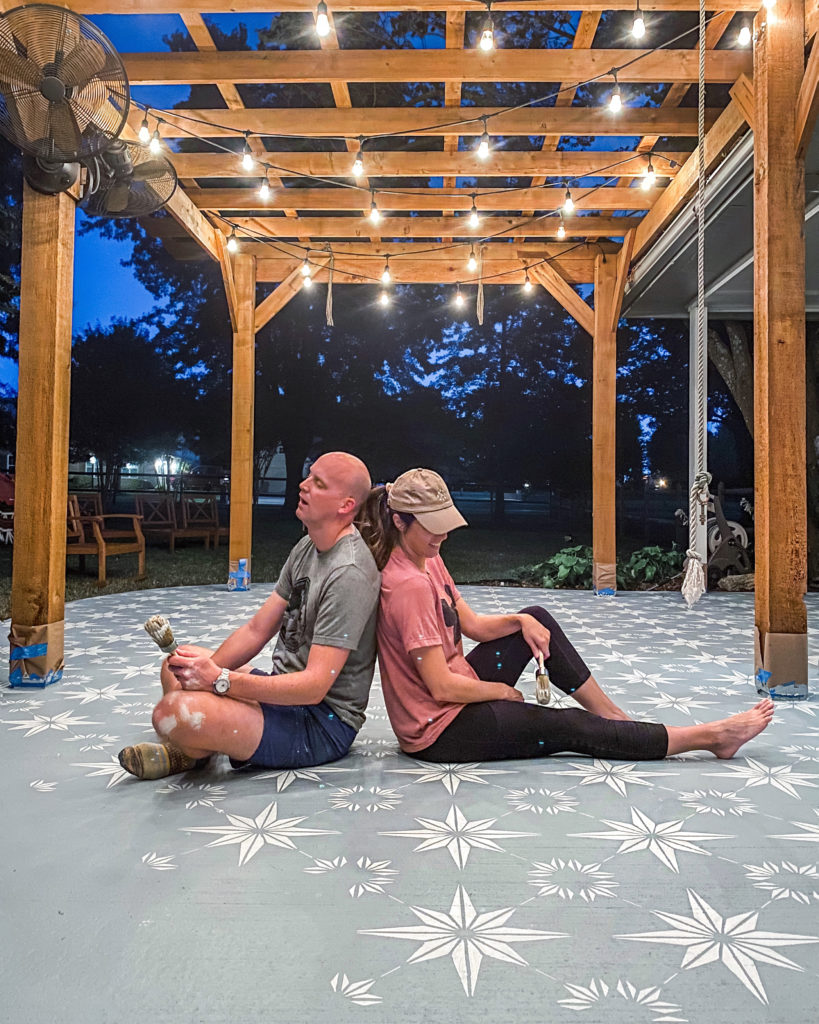
We did it!! We finally finished our DIY painted and stenciled porch floor, and boy…it was a doozy to complete. A few years ago, we updated this space by adding more poured concrete and a pergola [HERE], and now it’s even more fun out here! If I had it to do over again, would I choose such a huge area to stencil for my first try? Absolutely not. Can I move my muscles and joints without moaning in pain? Again, nope. Am I glad we tackled this project in the end? Answer at the end….
What I can tell you is that Russell and I had a fun time working together on this porch floor well into the starlit evenings, and guess what? WE DID THE ENTIRE STENCIL WRONG!! 😩 Click [HERE] to see how the stencil should look. Sigh. In the end, we still love the “unique” pattern we created, although we definitely made it harder on ourselves by not following instructions, ha!

SUPPLIES WE USED:
-Star stencil [HERE]
-Behr bonding primer
-Behr porch + patio floor paint in *custom color (see below)
-Behr low lustre sealer (3 coats)
-Round blunt paintbrushes
-High density/texture paint rollers for primer and paint
-Medium density roller for sealer
-Painters tape and paper
-Leaf blower (Project MVP for quick + mess-free removal of bugs and leaves!)
-Spray adhesive
-Paint thinner for cleaning stencil
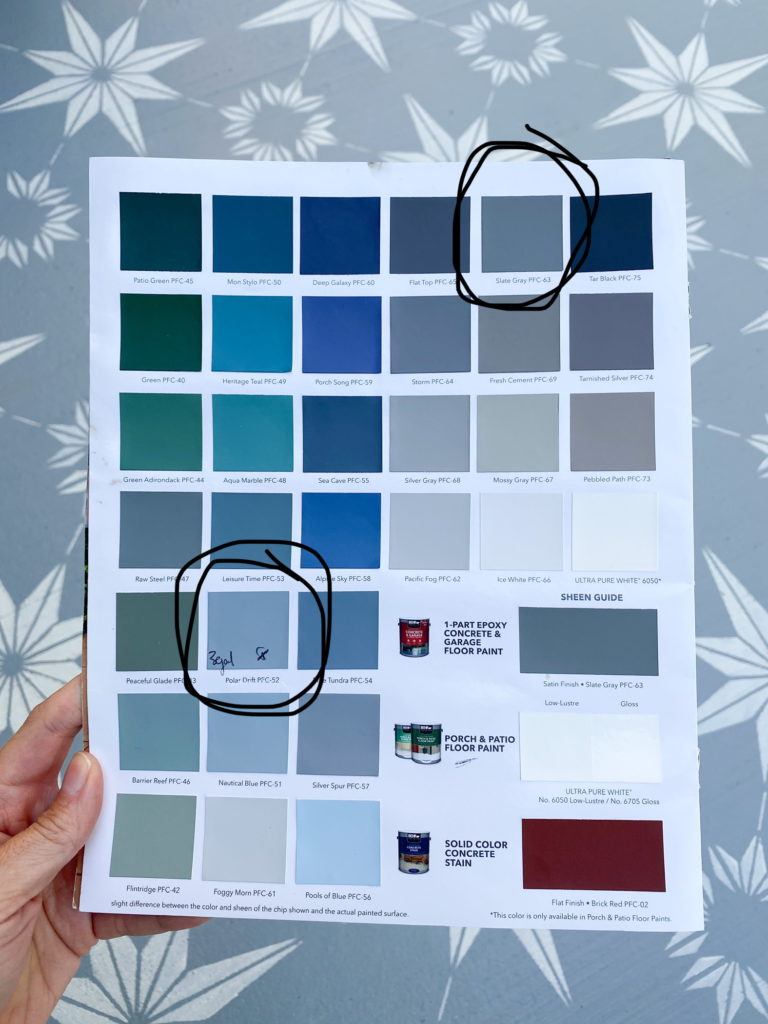
After testing Polar Drift (too icy) and Slate Grey by Behr, we decided to split the difference! We mixed EQUAL PARTS of both colors to create a muted grey/blue that changes colors depending on the sunlight. I love it! My helpful Instagram peeps [HERE] actually voted for Slate Grey, but I really really wanted to do this with a blue color to match the outside of our home to the colors we use inside: pale grey/blue, white, neutral wood tones. I LOVE how it turned out with the white of our brick and the cedar of our pergola and patio furniture, plus it’s just a fun pop of color!
STENCIL METHODS:
Y’all, when I say we went into this project semi-blind, I mean we spent about 30 minutes researching how to stencil a floor online and then started. 😳 I don’t know what’s happened to me! I used to be such an over-planner, but dang. Sometimes you just gotta start and go if you find yourself with a spot of free time, because who knows when the next free day will come!
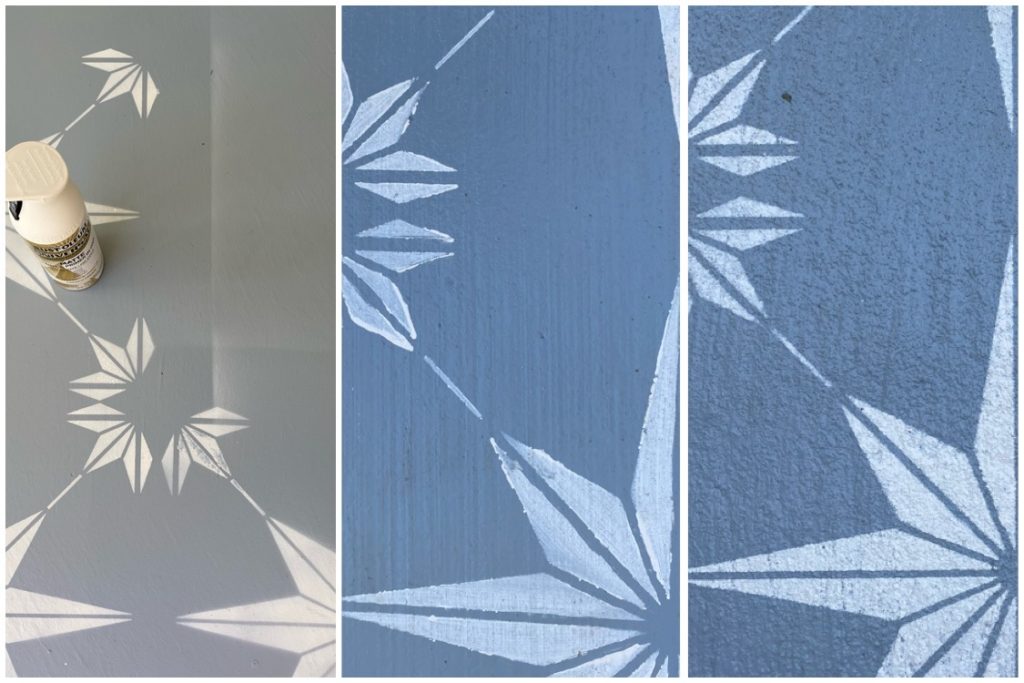
During our “research,” we saw a SO MANY different stencil methods being used, so we were truly at a loss as to which would be best. Above are the three we tried, and I’ll tell you why we did or didn’t like them:
LEFT: Spray paint. Man, we tried to make this one work because it looked so easy online! Even after taping brown paper to all sides, using a box with the top and bottom cut out and trying different spray angles, the mist or fall over from the spray paint created edge lines and discoloration of the area around the stencil, and I just didn’t want gridlines on the whole porch. You can see them starting to criss cross each other above (and look how the color reads gray under the covered patio portion of our porch!)
CENTER: Round, blunt paintbrush loaded with little paint and brushed side to side. This method was quick, but messy. Pushing the paint brush side to side also pushed paint into the corners and points of the stencil causing goopy buildup and messy lines. We actually went back and painted over some of the stenciled areas we did using this method and started over bc it was pretty bad. DON’T DO THIS ONE.
RIGHT: Same round, blunt paintbrush with little paint AND offloaded onto a plate/paper towel and then lightly stippled over the stencil two times. THIS ONE. Of the three we tried, DO THIS ONE! And actually, a bunch of my IG buddies said doing this method but using a sponge brush is even better, but I was not about to stop midproject and go shopping. By this time, I just wanted to FINISH IT. 😂
People also told me later that they had success using an airbrush or even a mini roller to get even coverage, so maybe try those out on your own DIY stencil project and let me know what you think!
PROJECT LENGTH:
Wanna guess how long this project took us? The porch is roughly 30×15, and Russell and I each had a stencil to work with. In total, we spent almost 17 hours (SEVENTEEN HOURS) from start to finish over a span of three days. LORD. HAVE. MERCY. 😴 We were so sore and so tired, because it’s a bunch of hunching, squatting, kneeling, crawling, standing up and down, up and down and trying to be verrrrrry careful while doing all those things not to smudge the paint. So. That begs the question: would I do this again knowing the time and physical pain it requires? I honestly think I would, call me crazy! It’s just such a fun, funky pop of color and pattern, and after a few weeks (maybe months…), we’ll forget the pain and just enjoy the porch!
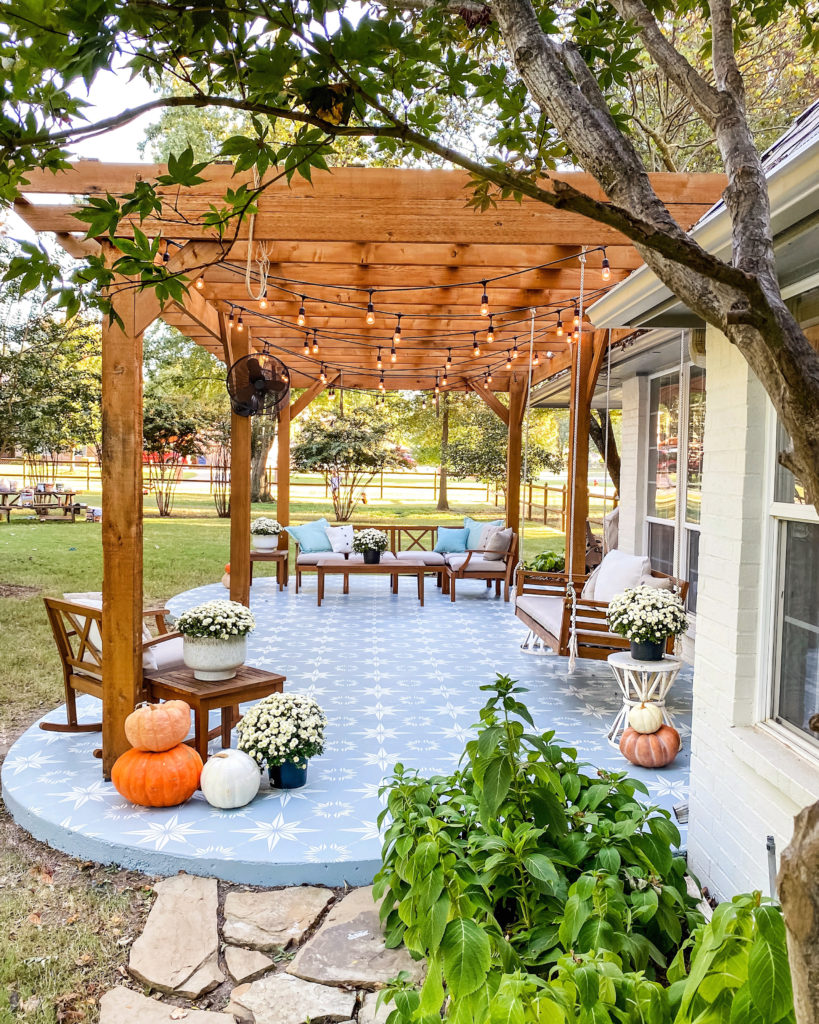
There ya have it! Our DIY painted and stenciled porch floor project is complete, and we are ready to rest and enjoy the space. Couldn’t have asked for better weather, and I’m honestly glad the timing didn’t work out to do this in the summer like I’d initially wanted. Hope this post is helpful if you are considering a stencil project of your own!
❤️ERIN
PS – Wanna see how I totally pranked Russell into thinking we’d have to start completely over…? Check out my Instagram saved stories under “FLOOR STENCIL.” It was hilarious and I love him. 😉


I love this project and watching along. I kept trying to comment and mention that a roller works 1000000x better than a paint brush. The brush bleeds SO much, but the roller hardly at all. Learned it from Mary Lauren on Instagram.
Love this project you did and love even more that you did to together! And while I know the stencil wasn’t “SUPPOSED” to go that way, you now have something no one else has! Love following along with you and your sweet family! Thanks for sharing life with us!
Girl!!! I feel you in the soreness!! That u is me every time I garden or do big project bending over!! Your patio looks beautiful!! Well done! Now soak those sore muscles!! Side note… it’s always so fun reading your post about your adventures. I’m grew up in Oklahoma and moved away for my husbands job 15 years ago. I’m an Okie forever though!
Your porch is an actual dream!! I know it must have been frustrating at the time, but wow!! Amazing job!!
Looks great. You and Mr. Stems did an awesome job. I would love to stencil me a border on my patio and make it look like a rug.
Wow this turned out so cute! That hard work definitely paid off!! Love this so much! 💕
Wow! I don’t think I could do it. But it looks amazing! The mixed colors turned out perfect. Thanks for being our guinea pig! 😜
I know it was crazy for you… but the final result is
F A B U L I O U S 💙💙💙💙💙💙
Love watching your IG & Stories.
🙏🙏🙏🙏❤️
You two did such a wonderful job! I enjoyed watching it come to life! Great work and effort!! Still looks amazing after figuring out the stencil wasn’t lined right lol
It turned out so good!!! You guys are troopers for sure! I would be paralyzed if I tried to do that. 😂
It all turned out really nice!!! 17 hours to success and beauty!!
Your patio turned out great even though it was backbreaking work. Does the concrete now need to be sealed to prevent chipping? Great job and nice to work as a team.
Can you please share where you outdoor sectional is from? I’m not seeing a patio story on instagram anymore. Thank you
Love this! It is so beautiful! I’d like to do this to my porch, I was wondering what type of paint you used to paint the white stenciled parts? Was that also cement paint or any kind of paint? Thanks! Great inspiration!