")


")
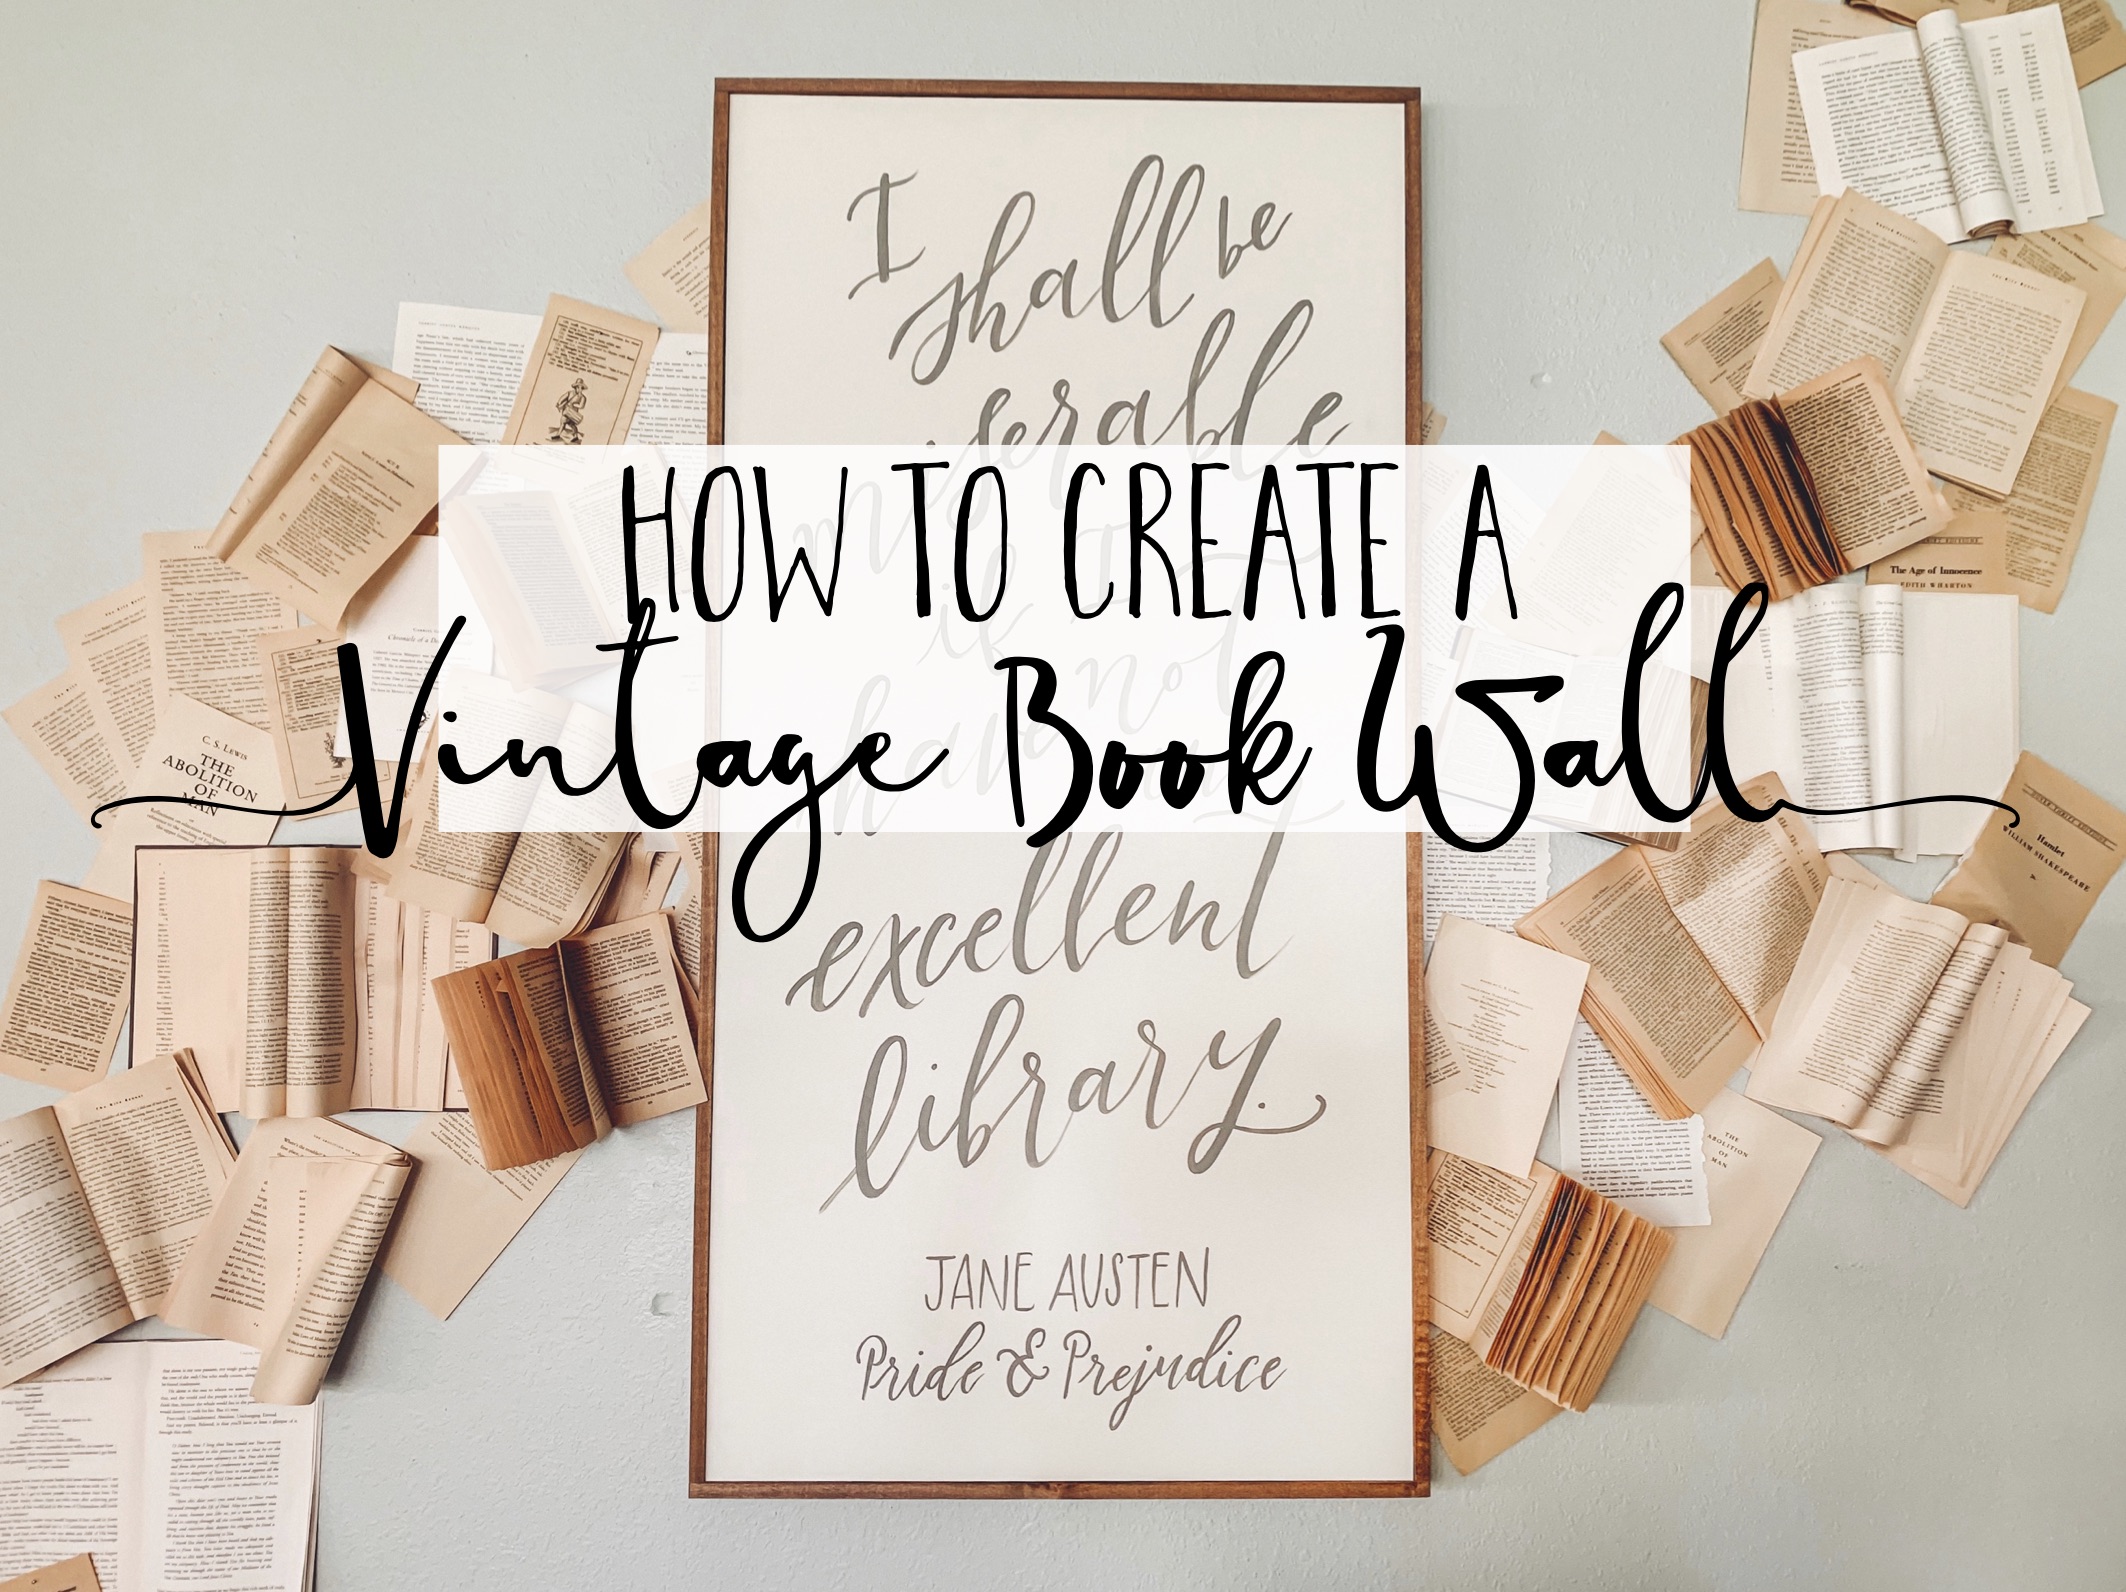
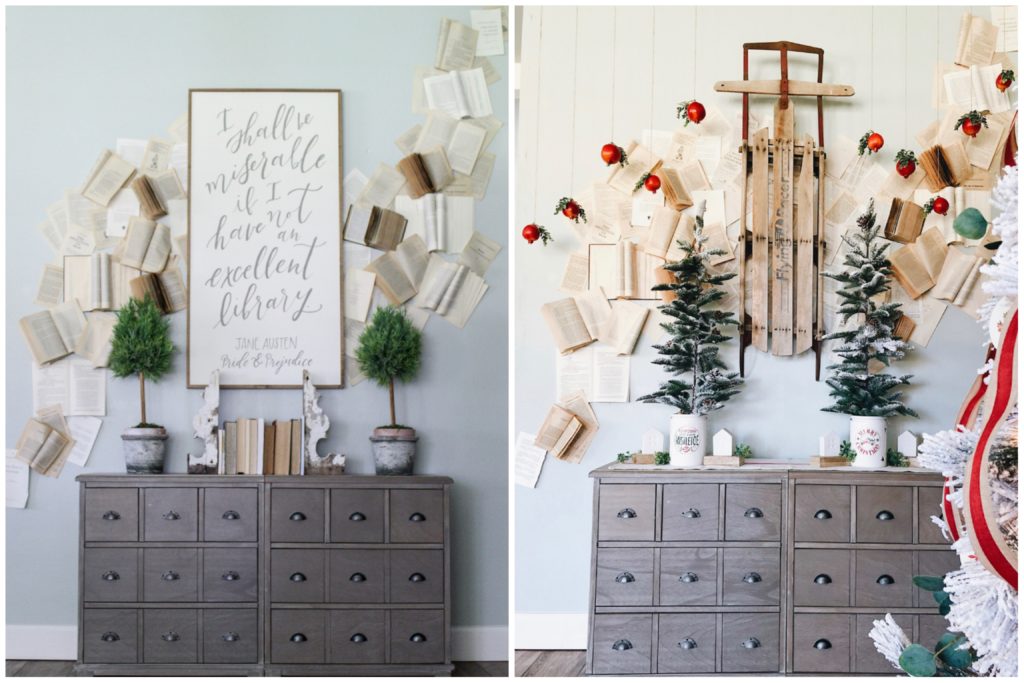
Funny, isn’t it, the flow of our lives? How one experience, one moment layers on top of another and another, until you look back and realize the vast amount of filled pages in the story of you. This flow, this layering was the inspiration behind this wall in my home. You see, bookworm for life right here, folks. 🤓😉 So much so that I went on to major in English literature and teach high school British Lit.
Books are everything! They are a way to see the world if our feet need to stay put; they open our eyes and our hearts and our brains to the new. New cultures, new ideas, new ways to just be. Every single time we close that last page on a book, we are better humans for it, and I wanted to pay tribute to some of the books that shaped me into me. Pride and Prejudice by Jane Austen is in my top three books ever, and it was my VERY favorite to teach to my Seniors. At first, sighs resounded, eyes rolled…but then. BUT THEN. They fell in love, too. Even the big ol’ burly football players who would nonchalantly linger after class to side-whisper and ask would Jane truly never forgive Darcy for his prejudice (or was it his pride…? Pop quiz. Sorry. Old habits die hard. 😉)
Books were life through childhood, college, my first career. They continue to be my happy place, and the flow of these vintage pages and my old college books represent, to me, the power of literature to sweep you up and take you away…all while adding page upon page, layer upon layer to the story that is you. ❤️
Recent features of the book wall:
TODAY – “Using Old Books to Create Art“
HGTV – “Turning Book Collections into Art“
How to create a book wall:
If you’ve ever wanted to create a book wall of your own, here’s how I made this one! Really, it was pretty simple: just hammer, nails and bit of tape. Just let your creativity flow…and don’t be afraid of a few little nail holes. Or maybe go another direction!
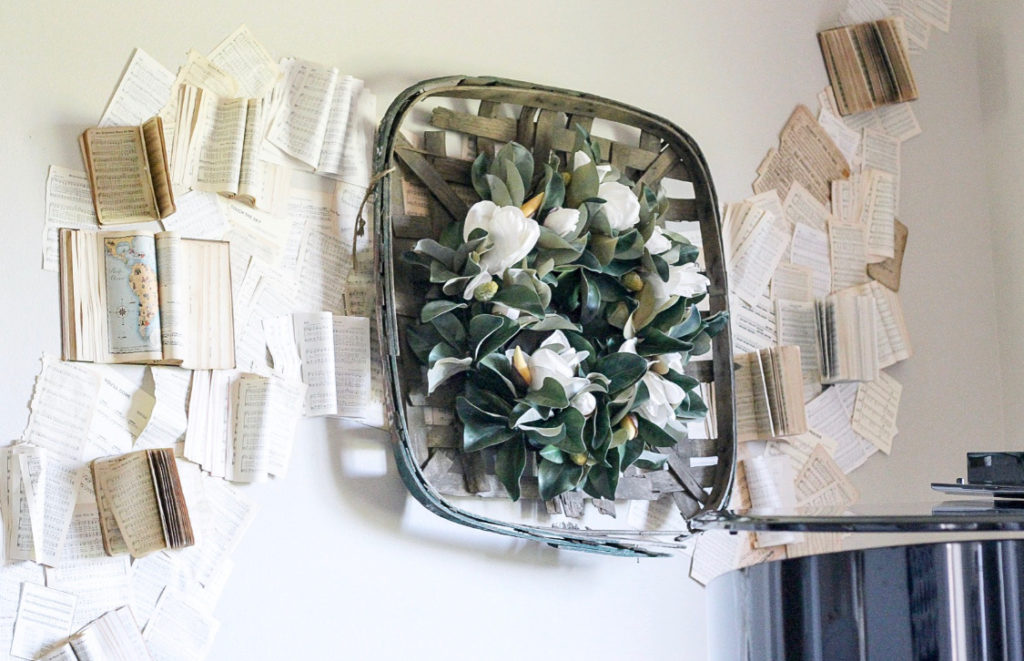
My friend Katie of @hellosweetshade and I created an installation wall in a her piano room using vintage music sheets. You could also use antique greeting cards or advertisements in an office, children’s picture books in a playroom, or vintage recipe cards or cook book pages in a kitchen! Change the scale and direction to your liking…possibilities are endless.
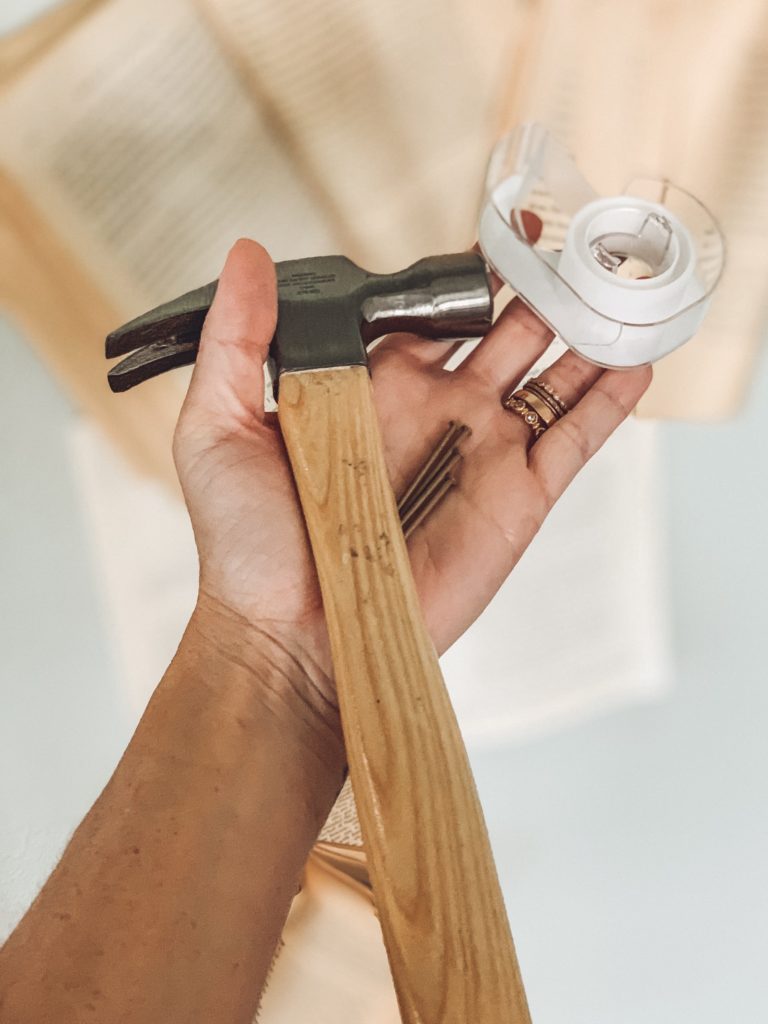
Here are the supplies you’ll need:
-pencil
-vintage books
-small finishing nails
-hammer
-invisible tape
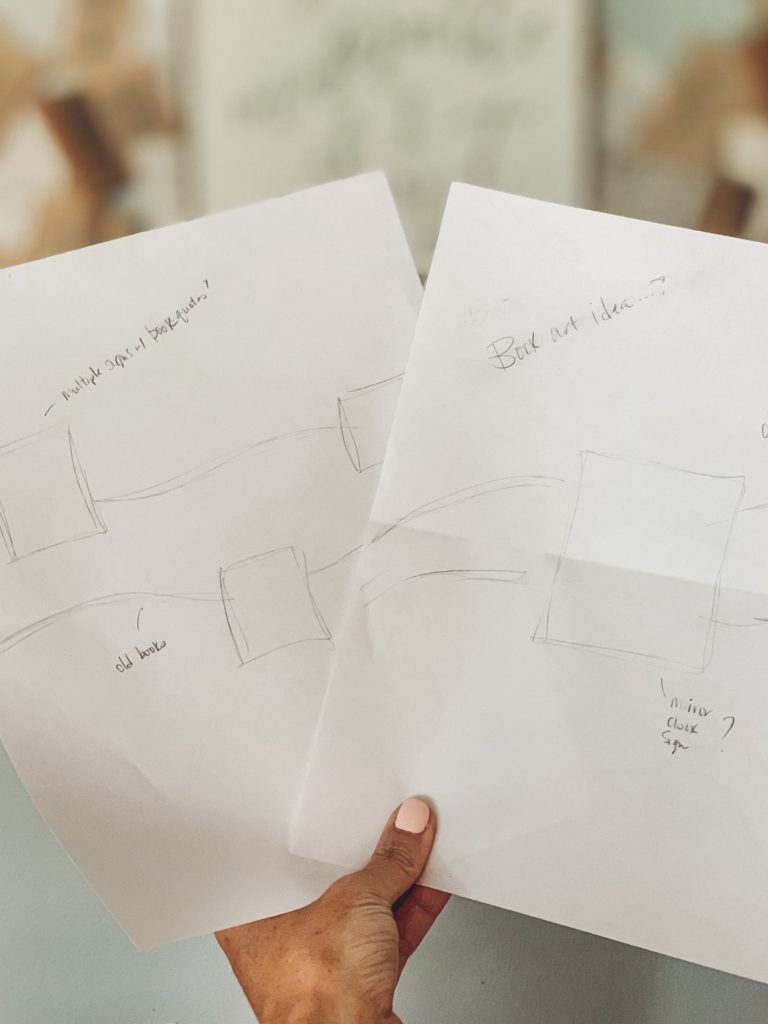
1 – Sketch design on paper and then lightly on the wall with pencil
Sketch a general idea of the design you want on paper first, and make sure to include space for a sign or feature piece if you’re including one. Once you are happy with the look, use pencil to lightly sketch the design on the wall. That way, if you need to change something, you can easily erase!
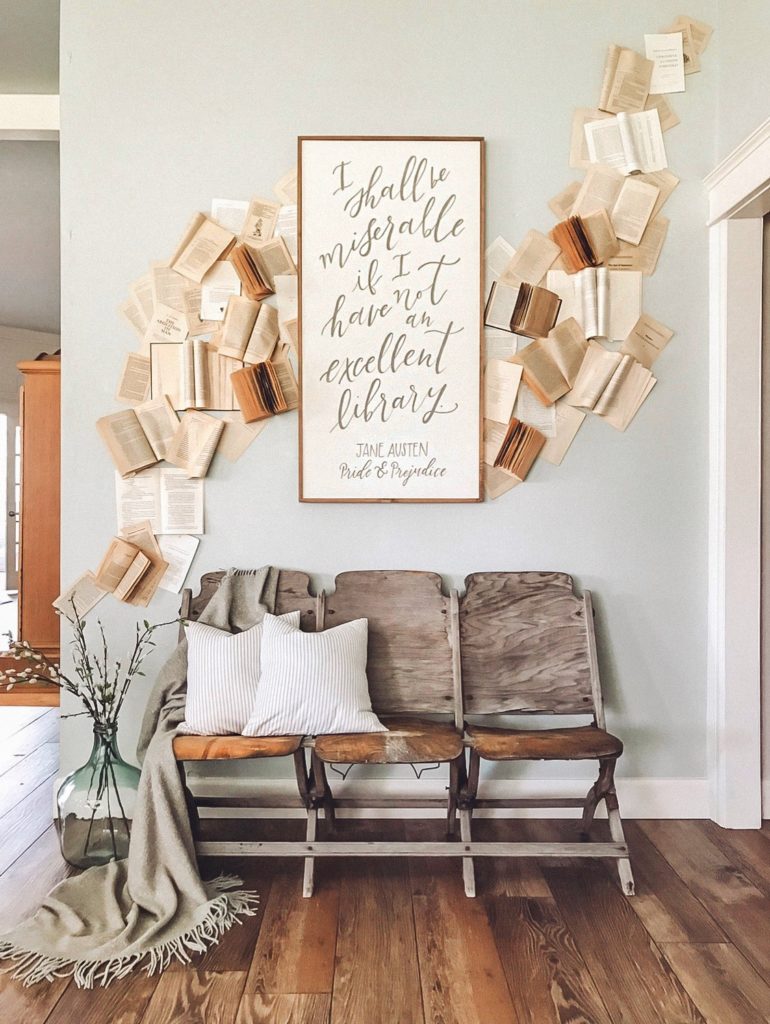
2 – Start attaching books at the center of design and work outward
Whether or not you’re using a centerpiece like a sign or mirror, begin attaching the books using hammer and nail at the center of the design and work your way outward. This will give you better control of the flow and direction, and you can easily change course just a bit if things start to go a bit wonky.
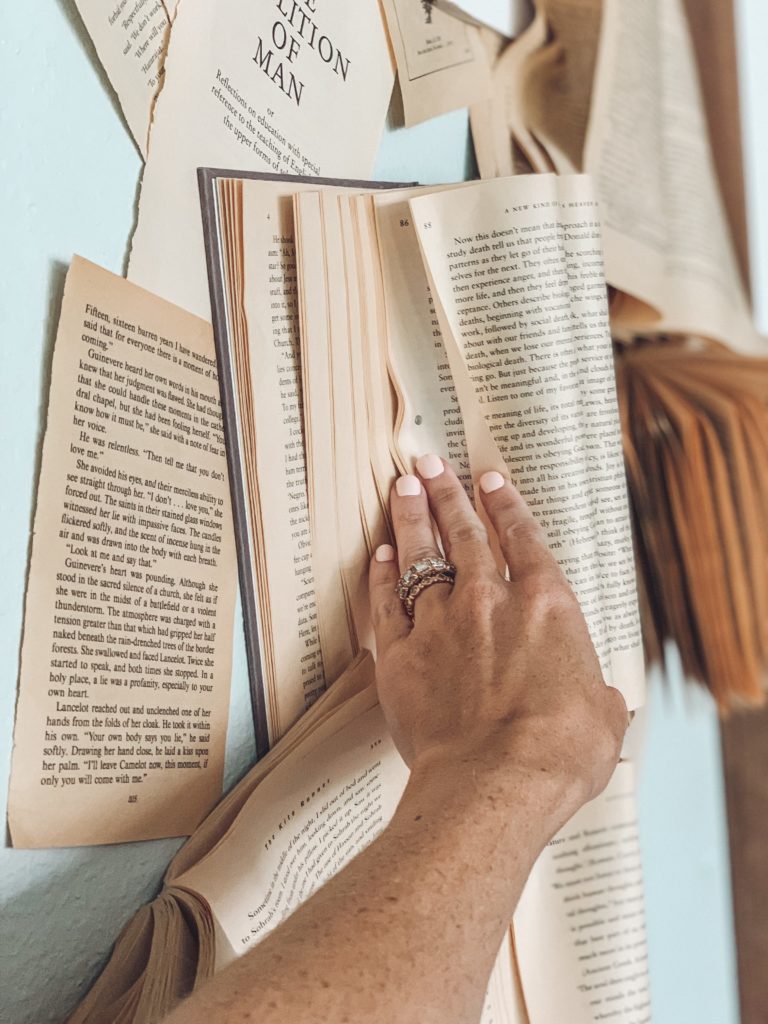
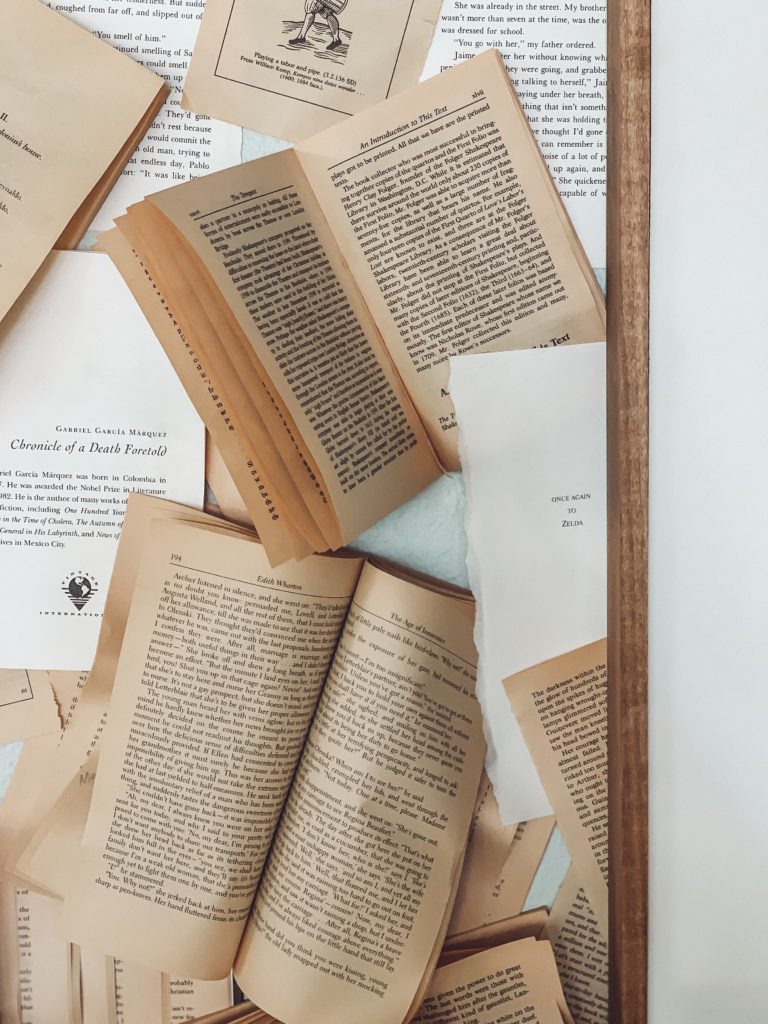
3 – To add texture, use use nails and tape to layer pages
To attach the whole books, I used small finishing nails on the covers to keep them secure. Then I would gather up a grouping of pages and push them inward towards the spine of the book to create texture and movement. Using finishing nails, I’d hold the desired design in place, making sure to save out a final page from the nailed section. Then, I took that single unattached page and used tape to affix it over the grouping of pages with the nail head showing. This hid the nail and finished the look.
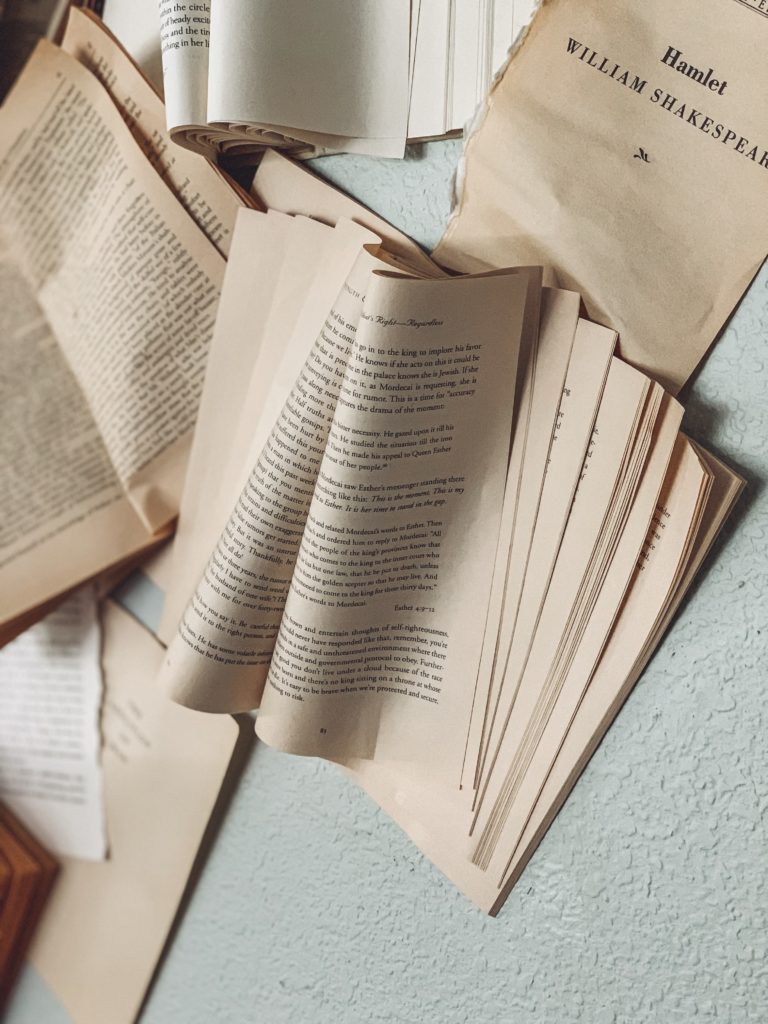
4 – Layer flat pages with ruffled and folded pages working your way down your sketched design
Mix in a few flat pages with the whole, ruffled up books to create texture and contrast to the design! I also used the flat pages to fill in holes between larger books and to fill out the design on the edges where I needed more of a curved shape. For the single pages, I often just used invisible tape or double sided tape, but you could opt for putty, too.
5 – Change up the decor with the season!
It’s been so fun to use the book wall throughout the seasons, and I love how versatile it is. I’ve swapped out furniture in front of the installation, replaced the sign with different items like a sled at Christmas or a mirror, and I’ve used hanging pomegranates and twinkle lights during the holidays, too! Again, the possibilities are endless, and the creativity continues to flow long after the book wall was installed.
I hope this was helpful, friends! SO much of the design is up to you. Leave pages flat for a bold statement, or ruffle them up and out using nails and tape for texture! Go big and bold, or try a smaller scale installation for quieter DIY. Tuck in some flowers in the spring, gently drape with fairy lights at Christmas and swap out the sign when creativity strikes! Most of all, give those dusty old books in your attic some new life…!!
-ERIN


Your book wall! I remember it being so eye catching on your Instagram feed. Something different, exciting, + super important to so many. That sweet book wall was so very pivotal for @cottonstem. Love your creativity, Erin!
Thank you so much for taking the time to post this! I have been looking forward to doing a wall of my own! I’m thinking that, since I’m a nurse, I may use this concept but with some of my medical books! What do you think?! I think it would look so cool in my home office!
This is such an amazing statement piece (or “pieces” I should say)! I love the creativity and the meaning behind it. Just beautiful!
I love your book wall! It adds such lovely texture and warmth against the blue wall. But don’t you think this quote should be taken as ironic? If I recall correctly, it is made by Bingley’s sister as she attempts to steal Darcy’s attention away from his book. The way Austen describes it, she seems to have little genuine interest in books but great interest in gaining Darcy’s approval.
I love this so much! My husband and I are book nerds and read the classics together. We’re discussing trying this book wall in our new house.
Love this!! I’ve been trying to save up used Harry Potter books from Garage Sales for years to do something like this with. Thanks for the tutorial.
Dust! How do you keep it clean without messy it up?
Also, do you have certain pages or books you like the wording on? Or just any ol book?
This is what brought me to you on Instagram and my life was changed forever! ❤️❤️❤️-@sammpaulson
I love this! But I would love to do something similar on my fireplace – any suggestions on what to use besides nails to get it to stay?
Wondering where the print is from…
I love this!! Thanks for the tutorial! Great ideas how to change it up, too. We are gathering books!
You are so welcome!
My mom just gave me her recipe box full of handwritten and typed recipes. Now I know what to do with it! Thanks for the inspiration!
This is the most magical wall!!!! 🥰 I need to do this. Thank you for the walk through on how to do it! You do great work and your content is delightful!
Absolutely love this setup! How big is the Jane Austin Wall Frame? I love the size of it with the wall. Stunning!
Quick question- Do the pages of the book get ruined since they aren’t protected ?
[…] She Holds Dearly Eryn Whalen Online Cotton Stem […]